Create a reward
Build a reward in Build → Rewards and fill the fields every reward type shares, ready to link to a touchpoint.
Build a reward your participants can win, then fill the fields it needs before you link it to a game, an offer, or a campaign-wide rule.
Before you begin
- You can open Build → Rewards inside the campaign.
- You know whether the reward is for a game, an offer, or a global rule that reacts across several touchpoints.
- You have the reward title, subtitle, icon, quantity, and participant messages ready.
Assets you'll need
A reward carries one image — its icon — shown to players wherever the reward appears (the rewards list and the reward drawer). You set it here, once, and it follows the reward to every touchpoint it's linked to.
Reward Icon
OptionalThe icon that represents a reward.
- Optional
- Size800 × 800 px
- Aspect ratio1:1
- FormatsJPEG / WEBP / PNG
Circular design and a transparent background work best.
For every image spec in one place, see Image & asset specs.
Steps

Choose the reward category
The Create New Reward dialog opens on the category picker. Pick the card that matches how participants should earn the reward:
- Create a Global Reward — campaign-wide distribution linked later through a Reward Trigger. This is the only category that can reach an event, treasure hunt, or treasure hunt object.
- Create a Game Reward — tied to one game or interactive experience.
- Create a Receipt Game Reward — tied to a receipt-based challenge.
- Create an Offer Reward — tied to a promotional offer.
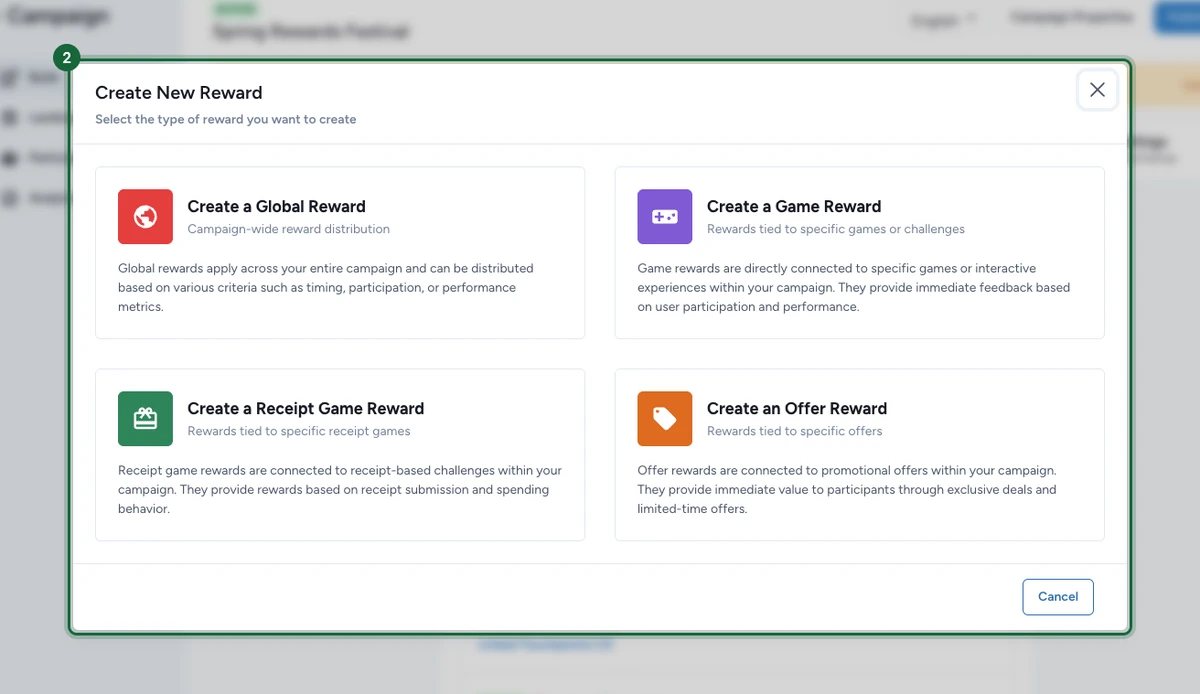
The category decides where you link the reward
Pick the category that matches how participants should earn the reward, not just what the prize is. To see where each category links, read How rewards connect to touchpoints.
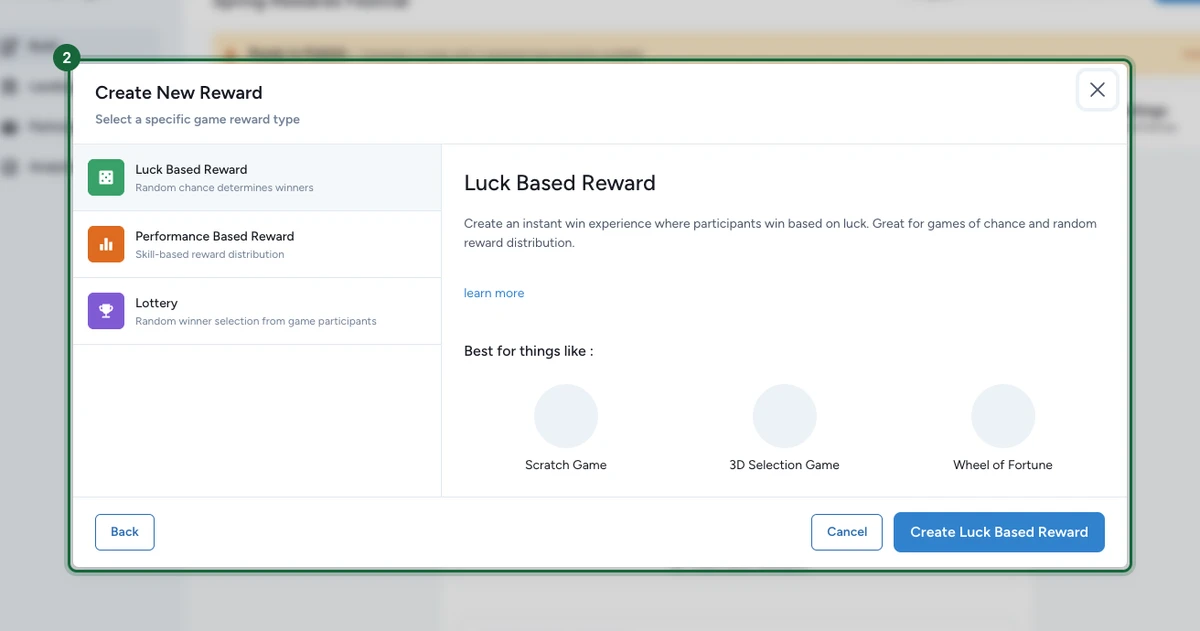
Choose the specific reward type
OmniLab Studio then asks for the specific type inside the category you picked. For a Game Reward, choose:
- Luck Based Reward — random chance determines winners (scratch, 3D selection, wheel of fortune).
- Performance Based Reward — skill-based distribution.
- Lottery — random winner selection from the game's participants.
Select the type, then the confirm button at the bottom right (for example Create Luck Based Reward). For Game, Offer, and Receipt Game categories, this step is also where you pick the specific game, offer, or receipt game the reward ties to. A Global Reward skips that and is linked afterward through its Reward Trigger.
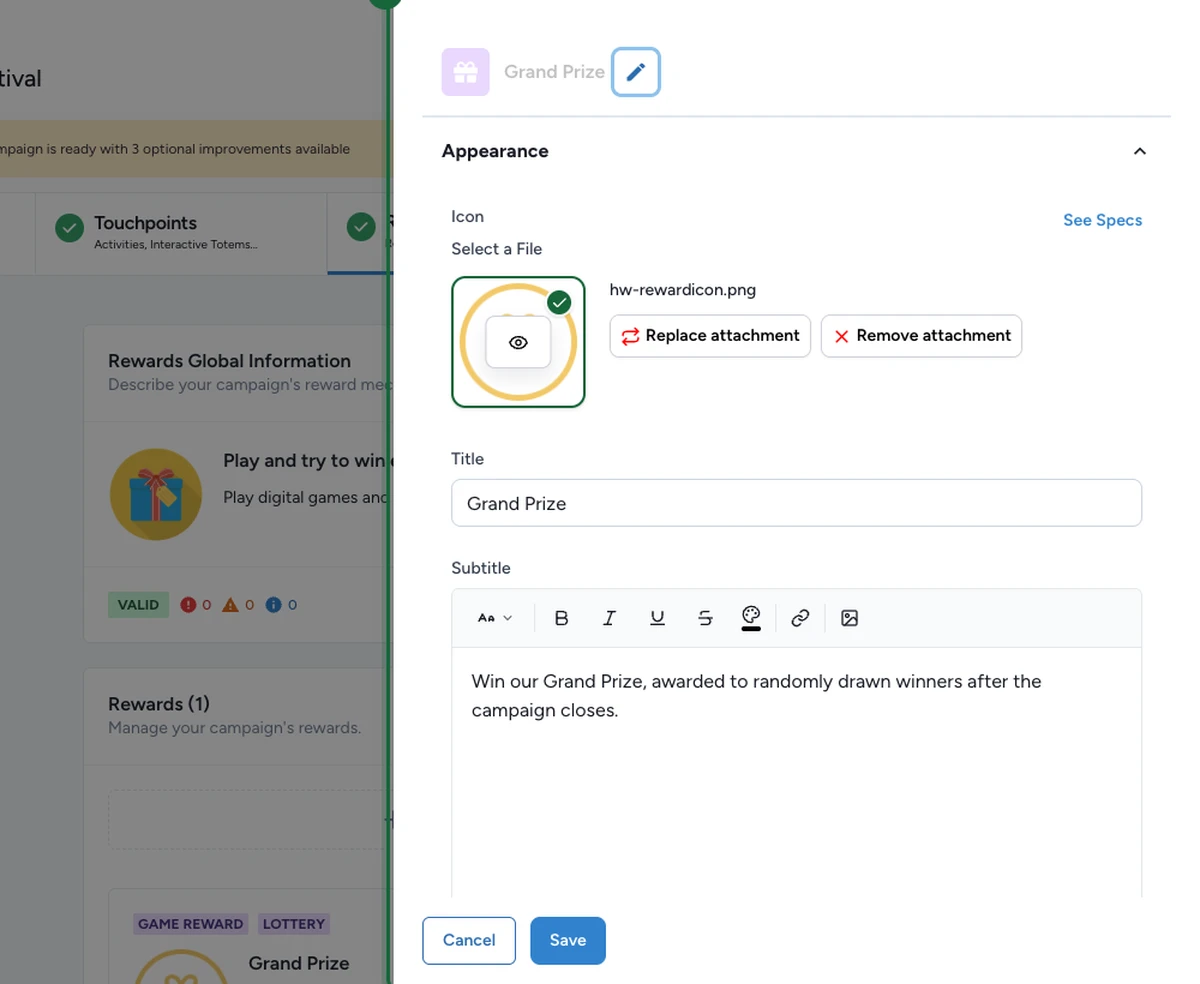
Fill the appearance: icon, title, and subtitle
The reward editor opens on the Appearance section. Complete the fields every reward shares:
- Icon — select a file, or use Replace attachment to swap it. Use See Specs for the exact size.
- Title — the reward name participants see.
- Subtitle — a short line that clarifies the reward.
Set the quantity
Open Reward Quantity and set how many can be won in the Quantity field.
If the reward flow supports it, OmniLab can also show Unlimited Quantity. Use that only when the reward genuinely belongs to a compatible luck-based game flow.

Write the participant messages
Open User Messages and complete Messages for Winners — the winner title and description participants see when they win.
Depending on the reward type, you may also need an eligible message for lottery rewards, a non-winner message for draw-based flows, or a redemption warning when the winner claims the reward later. Write these from the participant's point of view, so they understand what just happened and what to do next.

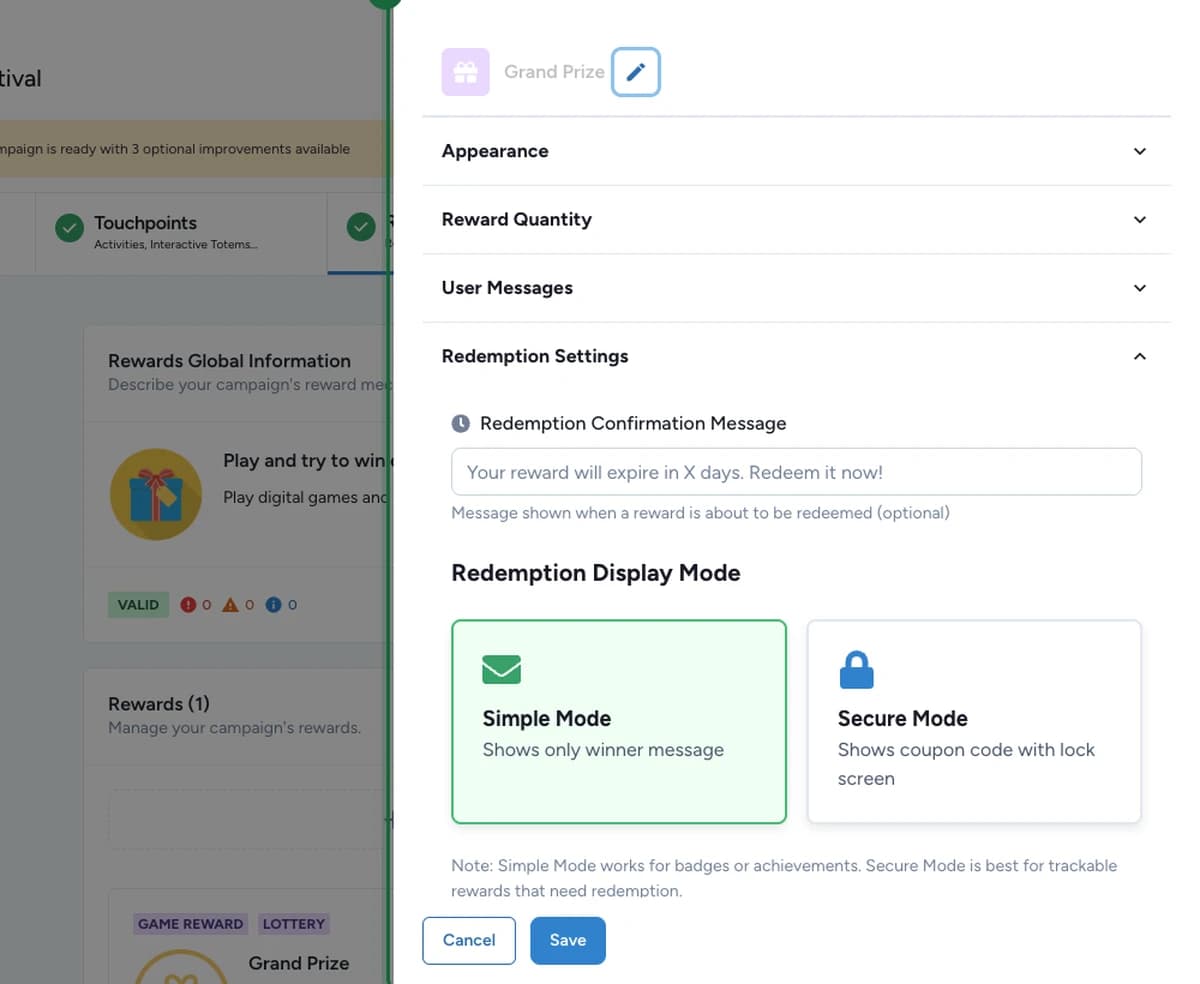
Review redemption settings and save
Open Redemption Settings if the reward needs a claim or code experience. Set an optional Redemption Confirmation Message, then pick a Redemption Display Mode:
- Simple Mode — shows only the winner message. Best for badges or achievements.
- Secure Mode — reveals a coupon code behind a lock screen. Best for trackable rewards that need redemption.
Select Save when the reward is ready.
Result
The reward now exists in the campaign. Next, either link it to the touchpoint that should award it, or set its Reward Trigger if it should work across several touchpoints.
If something's blocked
A few common reasons and how to fix them:
- The reward title is missing — add a clear title in the Appearance fields.
- The reward icon is missing — upload an icon in Build → Rewards, open the reward, then go to Appearance.
- The reward subtitle is missing — add a subtitle that clarifies the reward for participants.
- The reward quantity is zero — set a quantity greater than zero so the reward can be won.
- The winner message is missing — complete the winner title and description under User Messages.
If validation blocks publication, use Validation and publishing to jump back to the exact reward field that needs attention.
Related
About rewards: categories and winning methods
Start here if you still need to choose the right category and method.
How rewards connect to touchpoints
See where each category links before you save.
Link rewards to touchpoints
Attach the reward to the game or offer that should distribute it.
Instant Win rewards
Continue here for global or single-touchpoint immediate reward distribution.
Lottery rewards
Continue here if winners should be resolved later in a draw.
Coupons and redemption
Choose the right winner experience when the reward needs a claim flow.