Add a touchpoint to a campaign
Add a touchpoint from the campaign builder, choose the right campaign experience, and continue in the matching app guide.
Add the game, activity, offer, or receipt experience participants will play, and get it ready to configure in a few clicks.
Before you begin
- The campaign already exists in OmniLab Studio.
- You can edit the campaign.
Add the touchpoint
Open the Touchpoints area
Open the campaign in OmniLab Studio, then go to Build > Touchpoints.
This is where you review the campaign's Touchpoints, open their configuration, and manage their order.
Click Add New Touchpoint
Click Add New Touchpoint to open the picker.
OmniLab creates the Touchpoint inside the campaign you're in, so you stay in the campaign builder.
Choose the right Touchpoint
Pick the Touchpoint that matches the participant experience you want to launch.
The picker can show individual game formats — Wheel of Fortune, Scratch Game, Memory Game, Quiz, Form, 3D Selection Game, Reveal Game, Catcher Game, and Simple Game — alongside other experiences such as Activity, Treasure Hunt, Offer Pass, and Receipt Game.
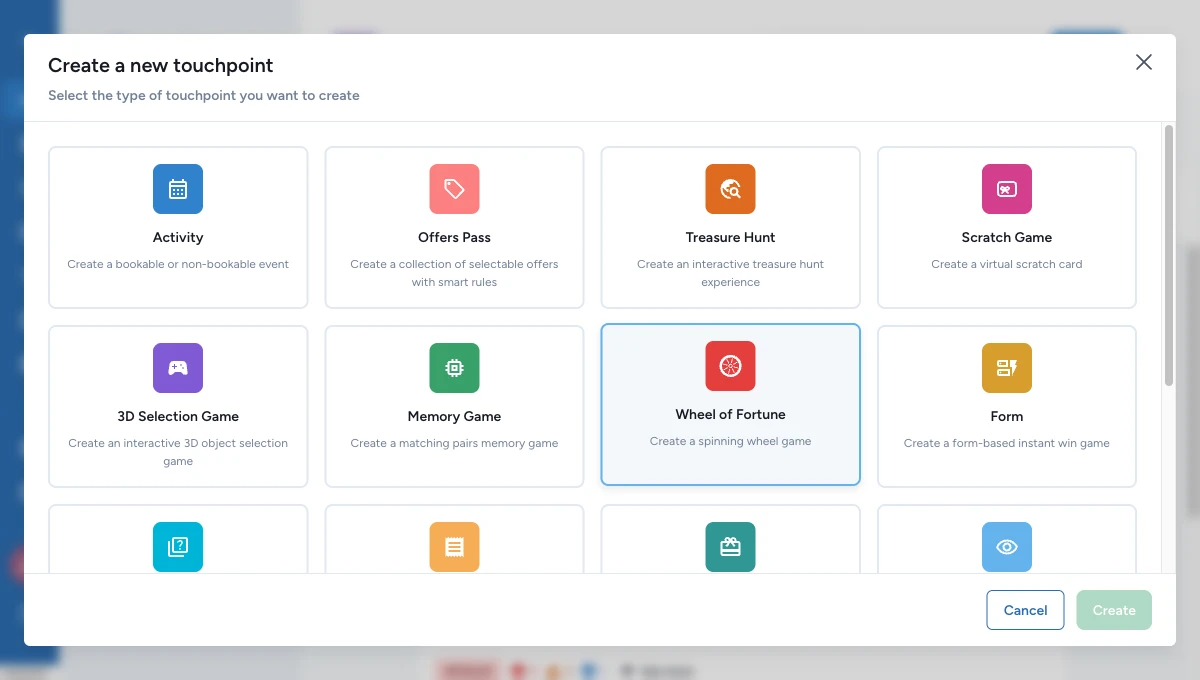
Click Create
Click Create to add the Touchpoint to the campaign.
The Touchpoint opens in its own configuration view so you can continue with the detailed setup.
Continue in the matching app guide
Finish the detailed configuration in the right app section:
- OmniLab Games for online games, Offer Pass, Offers, and related game-side experiences
- OmniLab Events for activities
- OmniLab Treasure Hunts for treasure hunts and treasure hunt objects
- OmniLab Transactions for receipt games
What the picker does and does not show
The picker is for the main Touchpoints participants enter from a campaign. Some items are managed from inside their parent experience instead:
- Offer items live inside an Offer Pass
- Treasure Hunt Object items live inside a Treasure Hunt
That is why those items are configured from inside a parent experience rather than added as standalone Touchpoints.
Disable a Touchpoint while you prepare it
Use Disable Touchpoint to keep a Touchpoint in the campaign but hide it from participants — handy while testing, scheduling, or preparing a later phase of the experience.
Manage the Touchpoint list
From the Touchpoint list, you can:
- move a Touchpoint up or down to change campaign order
- use Duplicate Touchpoint to clone a similar setup
- use Disable Touchpoint or Enable Touchpoint to control availability without deleting it
- use Delete Touchpoint to remove it completely
Good to know
Every campaign needs at least one Touchpoint before you can publish it. If you try to publish an empty campaign, OmniLab asks you to add one first.
If the picker doesn't show the Touchpoint you expected, check which apps are enabled for your workspace, then continue with the experiences available to your organisation.
Related
About touchpoints in a campaign
Understand which touchpoints you add directly and which ones are managed inside another experience.
Touchpoint dates override
Set a narrower schedule for one touchpoint when needed.
Restrictions (number, frequency, time slots, validation codes)
Control who can participate, how often, and when.
OmniLab Games
Continue with game-specific configuration after creation.