Your first receipt challenge
Create, test, and validate a first receipt challenge from an existing campaign.
Get a real receipt challenge running in one sitting. You will add one receipt challenge to a campaign, link one Reward, set one spend rule, and test both what participants see and what reviewers do.
Estimated time: 20 minutes
Before you begin
- You can open an existing campaign in OmniLab Studio.
- The campaign dates already make sense for testing.
- You have one reward idea ready, such as a tote bag, coupon, or gift card.
- You have one real sample receipt available for testing.
Steps
Add the receipt challenge to your campaign
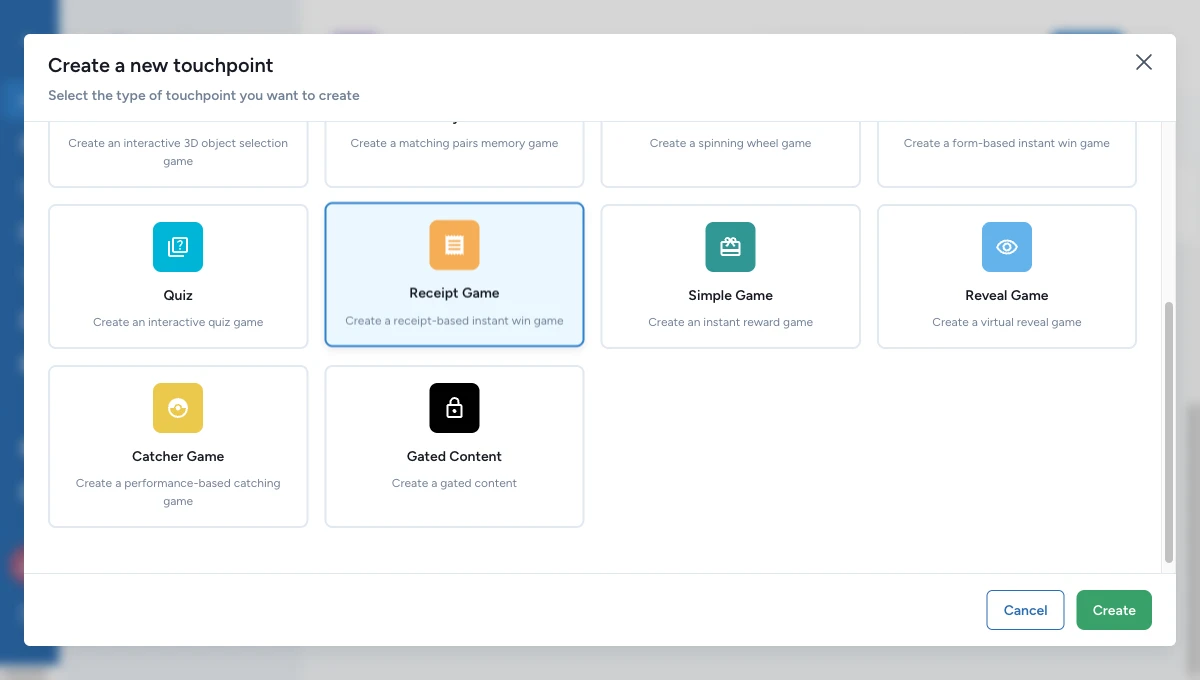
Open the campaign, go to Build > Touchpoints, then click Add New Touchpoint.
Choose Receipt Game from the picker. OmniLab adds it to the campaign and opens its settings.
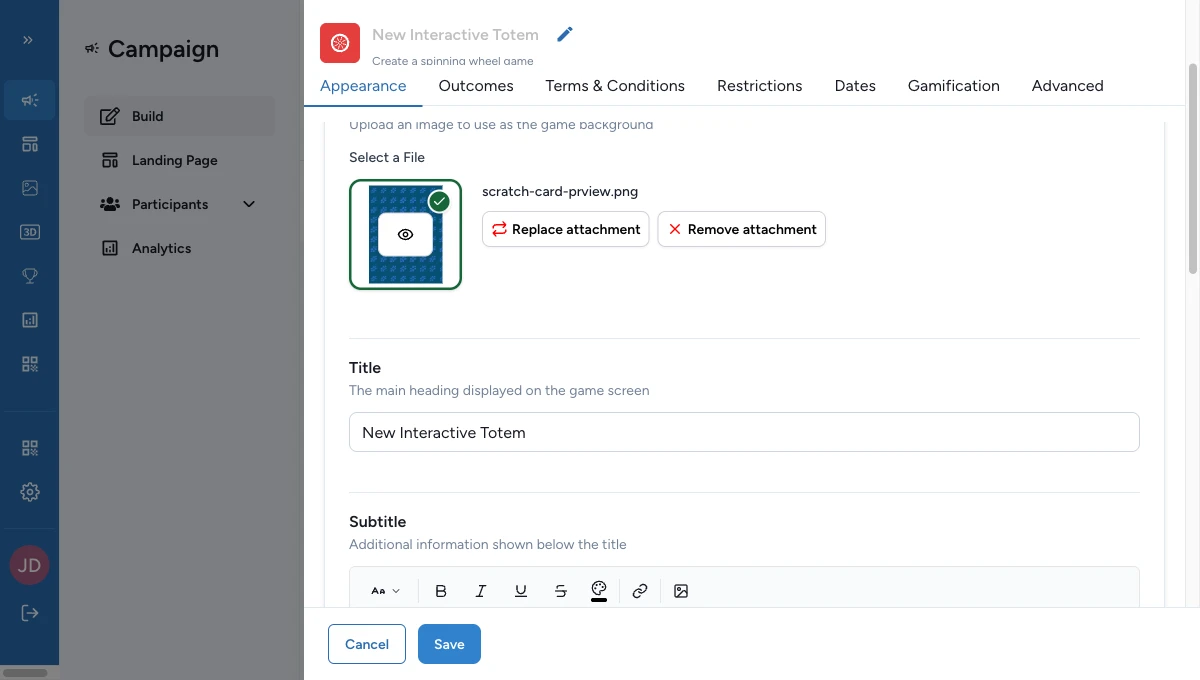
Fill in what participants see first
In Appearance, fill the fields participants notice first:
- Header Image
- Title
- Subtitle
- Details
- Submission Message
Planning on-site review? Also fill Host Validation Message so the QR-code handoff makes sense to the participant.
Create one Reward
Go to Build > Rewards, add a new reward, and choose Receipt Game Reward.
Keep the first version short:
- a clear reward title participants will read
- one icon or visual
- a realistic quantity
- winner text that matches the challenge
Save the reward, then return to the receipt challenge.
Add one winning option and one rule
Open Configuration.
In Winning Options, click Add Winning Option, then set:
- a Display Name
- a Total Quantity
- the Associated Reward
Next, in Rules, click Add Rule and create one spend rule. The rule condition is Total Amount, so a good first target is a spend amount such as 20.00.

Turn on the basic receipt checks
Still in Configuration, go to Receipt Acceptance Policy and turn on the fields you need for the first test.
For a spend challenge, a good starting point is:
- Amount required
- Merchant required
- Min Amount set to the same number as your rule
Then choose a Validation Mode:
- Automatic — use this when eligible receipts should count right away.
- Manual — use this when a host or staff member should approve them first.
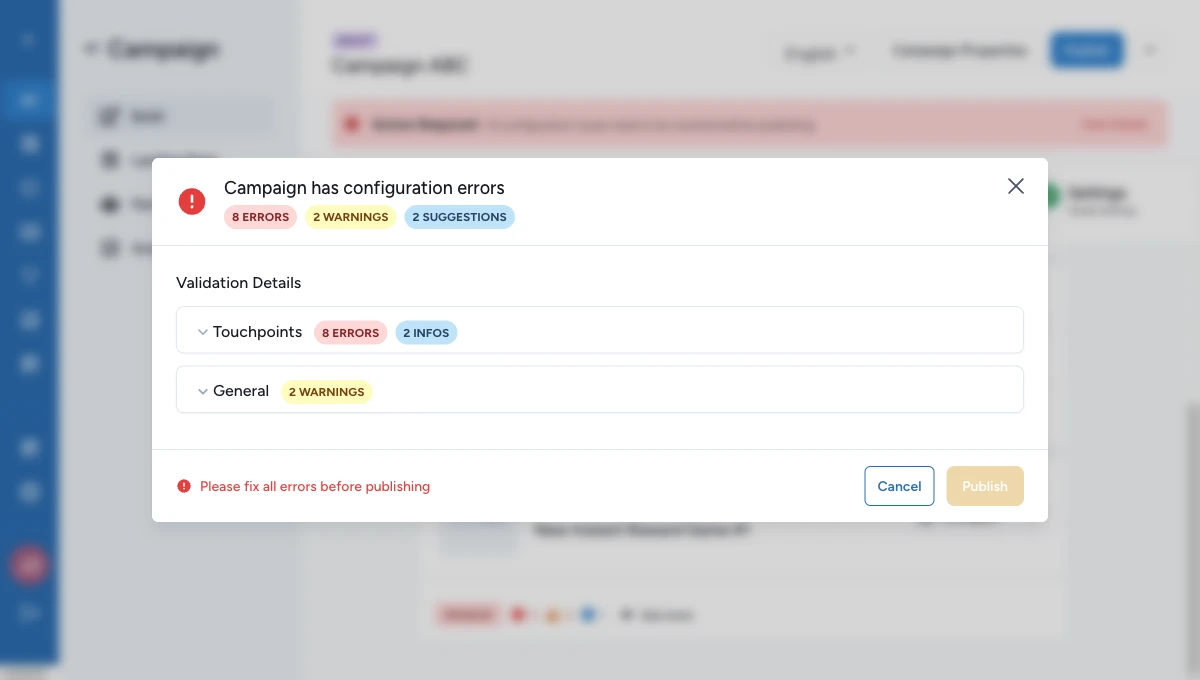
Publish, then test the participant flow
Publish the campaign first — you can't open it while it's a draft. Then, before the start date, load the receipt challenge on a phone and act as a test participant.
Tap the upload button, then follow the on-screen guidance: the image should be clear, sharp, centered on the receipt, with the merchant and amount visible.
In automatic mode, a valid receipt can count right away. In manual mode, the participant sees a pending state and the host-validation handoff.

Validate one receipt as a reviewer
When to use this: only if you chose manual mode in the previous step.
Open the reviewer tool, go to Liste des Sessions, then open the session you just created.
In Validation de Session, open the receipt and choose:
- Valider to approve it
- Refuser to reject it
- Modifier to correct the merchant or amount before the rules run again
What good looks like
A healthy first challenge behaves like this:
- the participant can upload a real receipt without confusion
- the accepted receipt becomes valid right away, or pending for review
- the rule is clearly linked to one winning option
- the winning option is linked to a Reward
- the reviewer can find the session and read each receipt's state without guessing
Related
Create a receipt game
Go deeper on creating the challenge and its appearance fields.
Acceptance policy overview
See how receipt checks lead to states like valid, rejected, incomplete, and duplicate.
Validation policy: manual vs automatic
Choose how much review you want before launch.
Test the receipt flow
Run a full pre-launch checklist once the basics work.