Generate Smart Links from existing campaigns
Use OmniLab Smart Links as the share layer for a published campaign URL without rebuilding the campaign.
Wrap a published Campaign in one OmniLab Smart Link that is easier to share, easier to print, and easier to measure. This page walks through the recommended workflow.
Why pair campaigns with OmniLab Smart Links
Building a Campaign and sharing it are different jobs.
The Campaign gives you the published destination. OmniLab Smart Links gives you the sharing layer in front of it: the /l/<slug> link, the QR designer, variants, and per-link analytics.
OmniLab Smart Links is especially useful when:
- the Campaign is already live but the share plan is still evolving
- you want one durable QR code for printed assets
- different placements each need their own variant analytics
- the campaign URL should stay behind a shorter public link
Recommended workflow
There is no shortcut that creates a OmniLab Smart Link straight from a Campaign. The reliable workflow is:
- publish the Campaign first
- confirm or copy the final campaign URL
- create a Redirection OmniLab Smart Link that points to that URL
- test the OmniLab Smart Link
- download the OmniLab Smart Link QR code for distribution
Turn a published campaign into a OmniLab Smart Link
Publish the campaign first
Finish the campaign setup and publish it before you build the OmniLab Smart Link.
That way the OmniLab Smart Link points to the final public destination, not to a draft or a path that may still change.
Copy the campaign URL you want to share
Decide which public campaign URL should sit behind the OmniLab Smart Link:
- the campaign landing page when visitors should start on the entry page
- a direct Touchpoint link when visitors should jump straight into one experience
Copy that final URL from the campaign's share options.
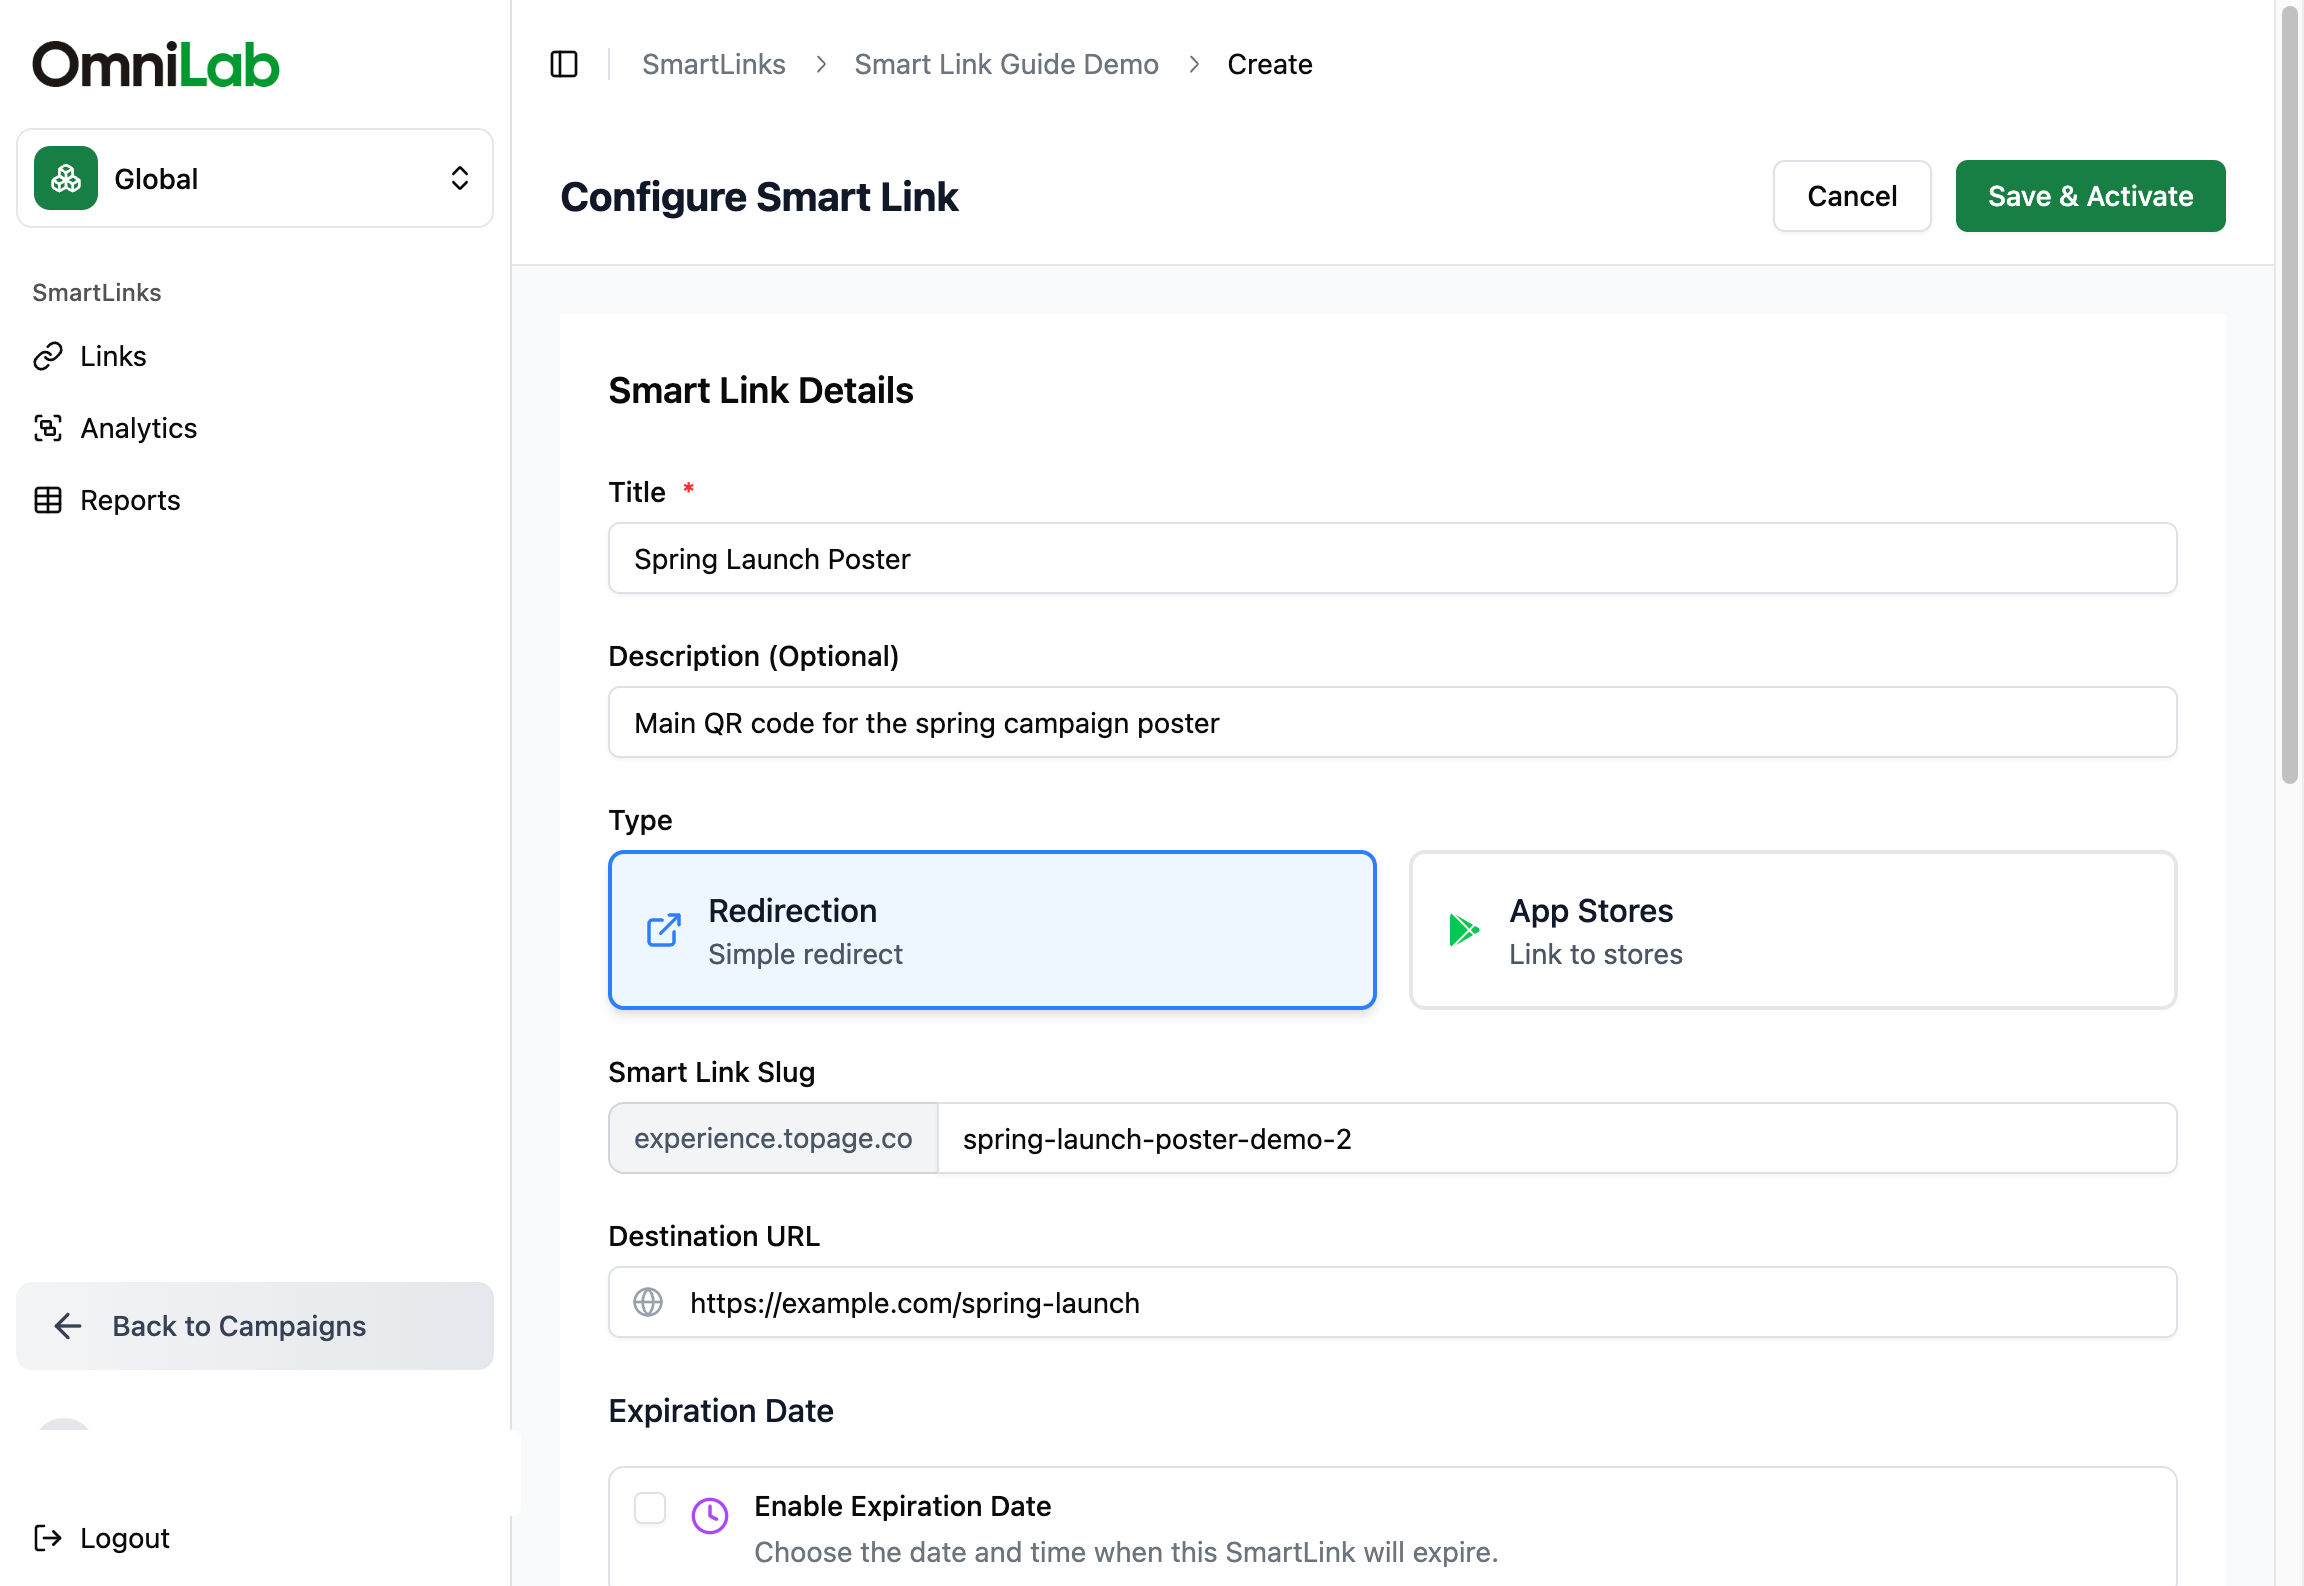
Create a Redirection OmniLab Smart Link
Open OmniLab Smart Links, go to the right folder, and click Create SmartLink.
Choose Redirection, then enter:
- a clear Title
- an optional description
- a short OmniLab Smart Link Slug
- the campaign URL you copied, in Destination URL
Add launch tracking (optional)
Add tracking now if you want placement-level or campaign-wide measurement:
- Add Variants when the Campaign runs across several placements, so each location or channel gets its own measurable link.
- Add UTM Parameters on the main OmniLab Smart Link when the whole launch should carry the same attribution values.
Save, test, and download the QR code
Save the OmniLab Smart Link, test the redirect in a browser, then scan the final QR code on a real phone.
Move to print or broad distribution only once the OmniLab Smart Link behaves exactly as expected.
Choose the right campaign destination
| Use this campaign URL | When it is the better choice |
|---|---|
| Landing page | The poster, flyer, or email should send visitors to the campaign entry page |
| Direct Touchpoint link | The visitor should jump into one specific game, offer, or Activity |
If you are unsure, start with the campaign landing page. It is usually the most flexible destination for broad distribution.
Example
You publish a back-to-school campaign and want window posters, in-store stickers, and a newsletter button to drive traffic into the same experience.
Instead of sharing the campaign URL directly everywhere, you create one OmniLab Smart Link such as back-to-school-launch, point it to the published landing page, then create variants for window-poster, counter-sticker, and newsletter. The Campaign stays untouched, while sharing, QR design, and reporting all happen in OmniLab Smart Links.
Related
Create a Redirection OmniLab Smart Link
Build the OmniLab Smart Link that will sit in front of the published campaign URL.
Touchpoint URLs & slugs
Understand which campaign URLs are available before you wrap one in a OmniLab Smart Link.
QR codes (download, design)
Compare campaign QR workflows with the richer QR options available in OmniLab Smart Links.