Your first event in 15 minutes
Create, publish, and test a first Check-In Only activity from an OmniLab Events template in about 15 minutes.
Get a real event live and test it on a phone in about 15 minutes, so you can see the full attendee experience before you invest in a more detailed setup. You will create one Activity, add one date, publish the campaign, and walk through self check-in yourself.
Estimated time: 15 minutes
Keep the first pass simple
This walkthrough stays with Check-In Only. Once that works, moving to Booking and Check-In takes far less effort, because the event details, dates, and day-of flow are already in place.
Before you begin
- You can open OmniLab Campaigns in OmniLab Studio.
- You can create or edit campaigns in your organisation.
- You have one banner image and one location image ready for the activity.
Steps
Choose an OmniLab Events template
Open OmniLab Campaigns, start from the template catalog, and choose an OmniLab Events template.
Either a booking or a non-booking template works here. You will switch the activity to Check-In Only later, so the first publish stays simple.
Fill the campaign basics
Complete the campaign Title, Slug, Language, Timezone, and overall campaign Dates. Keep the campaign window wide enough to include the event slot you want to test.
Review any values the template already filled in. The timezone matters: it sets how dates and check-in windows appear to attendees and staff.
Add or open the Activity touchpoint
Go to Build, then Touchpoints. Create a new Activity, or open the Activity that came with your template.
Activity is the Touchpoint you set up for events. You choose between Check-In Only and Booking and Check-In inside the activity settings, not when you pick the Touchpoint.
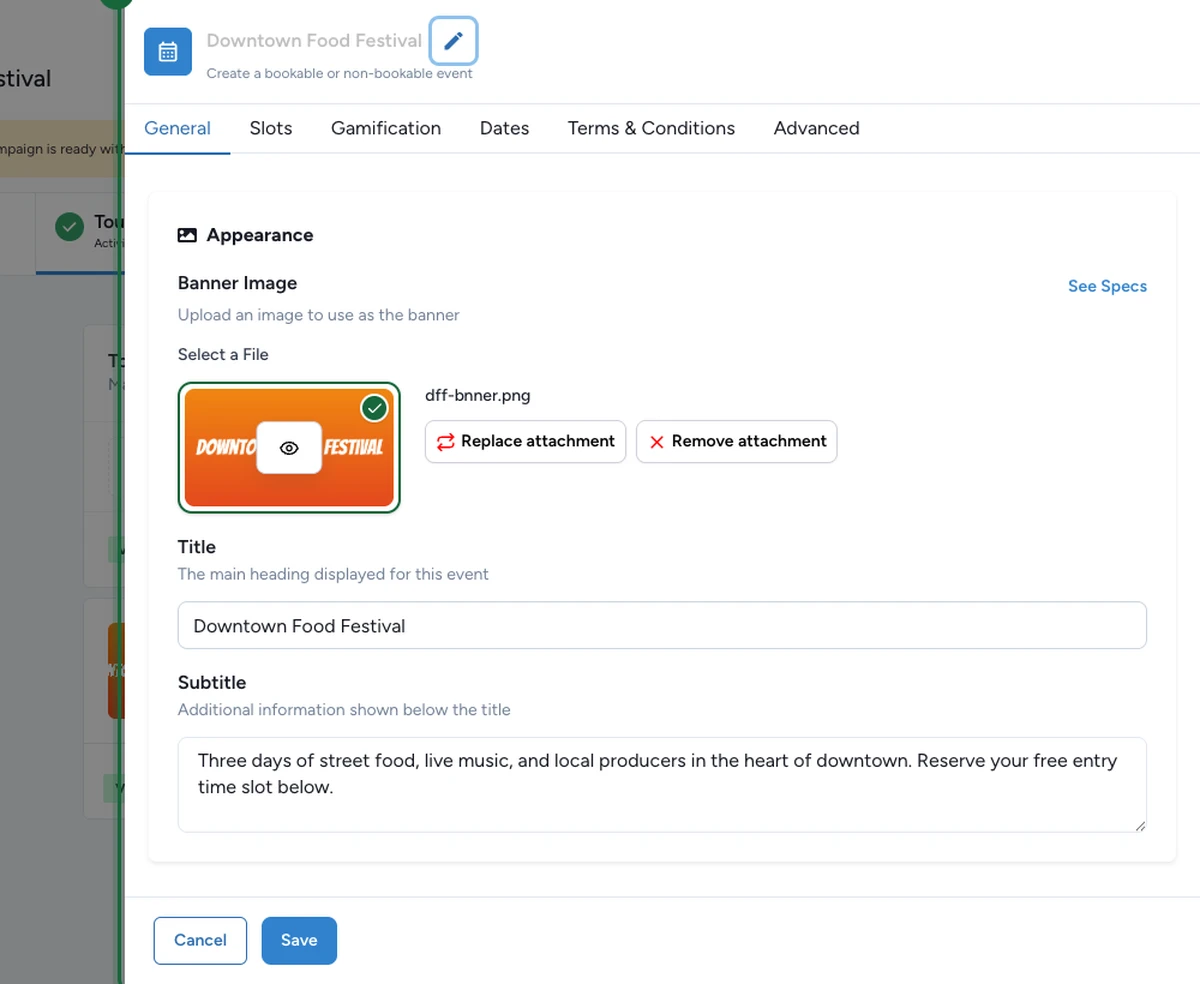
Complete the General settings
Open General and fill the attendee-facing essentials:
- upload a Banner;
- add a clear Title and Subtitle;
- write a short Description;
- fill in Location Area;
- add a Location Image.
For a first test, a quick example works well:
- Title: Downtown Food Festival
- Subtitle: Three days of street food, live music, and local producers
- Location Area: Level 1, central atrium
Do not skip the location fields
Location Area and Location Image are often the fastest way for attendees to confirm they are in the right place, especially in large venues.
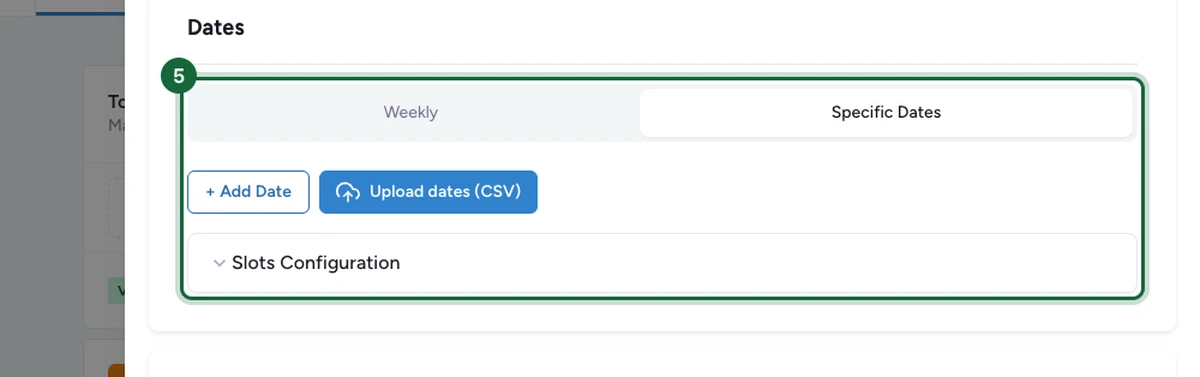
Add one specific date
Open Dates and switch to Specific Dates. Select + Add Date to create one clear slot, such as Saturday 14:00 to 18:00, then open Slots Configuration to set the start and end times. You can also bulk-import dates with Upload dates (CSV), but a single manual date is enough for this first run.
Keep it to a single slot for now.
- If the slot falls outside the campaign dates, widen the campaign window before you publish.
Choose Check-In Only
In Event Type, choose Check-In Only instead of Booking and Check-In.
This removes advance booking from the attendee flow. The first setup stays faster and you avoid configuring tickets on day one.
- To cap walk-ins, turn on Limited capacity and set the Total capacity for the slot.

Leave the check-in method on Self
Open the Check-in settings and keep Check-in Method on Self.
This is the fastest way to verify the full attendee flow. People check themselves in from their own device when the window opens. Switch to Scan later, when staff need to validate each arrival with the Scanner App.
Save and publish
Select Save, then Publish to run validation. Fix any blocking issues, then publish the campaign again once the checks are clean.
The most common blockers are missing event basics: the banner image, title, or dates.
Test the live attendee flow
Open the published activity from Share or Preview and test it on a phone. You should see the event details, the location cues, and a self check-in flow instead of a booking journey.
- If your campaign uses a landing page, open the landing page URL or QR code instead of the direct Touchpoint link.
Result
You now have a published Check-In Only event with one slot and a live attendee flow. That validates the essentials: event content, location cues, publication, and on-site self check-in.
What to learn next
When this first run feels comfortable, switch the same activity to Booking and Check-In to add ticket types, advance reservations, and staffed scanning.
Related
Event types (Booking + Check-in vs. Check-in Only)
Choose the right mode before you add more booking or attendance complexity.
Configure slots — weekly vs. specific dates
See when to stay with one-off dates and when to move to a recurring schedule.
Your first campaign
Use the platform-level walkthrough if you are also new to campaign creation.