Your first campaign
Build, publish, and test a simple campaign end to end in about 15 minutes.
Get a working campaign live in about 15 minutes, so you can see the whole OmniLab Studio-to-OmniLab Pages flow before you add anything advanced. You'll end up with a simple Wheel of Fortune game, one reward, and a test link you can open and play.
Keep this first one simple
This walkthrough skips advanced setup such as Opt-in, participation forms, and notifications on purpose. Publish one working campaign first, then build on top of it.
Before you begin
- You can access OmniLab Studio. If not, follow the access request process.
- You have permission to create or edit campaigns in the organisation you are currently viewing.
- You have one simple reward idea for testing, such as a coupon, voucher, or demo prize.
Steps
Create a new campaign
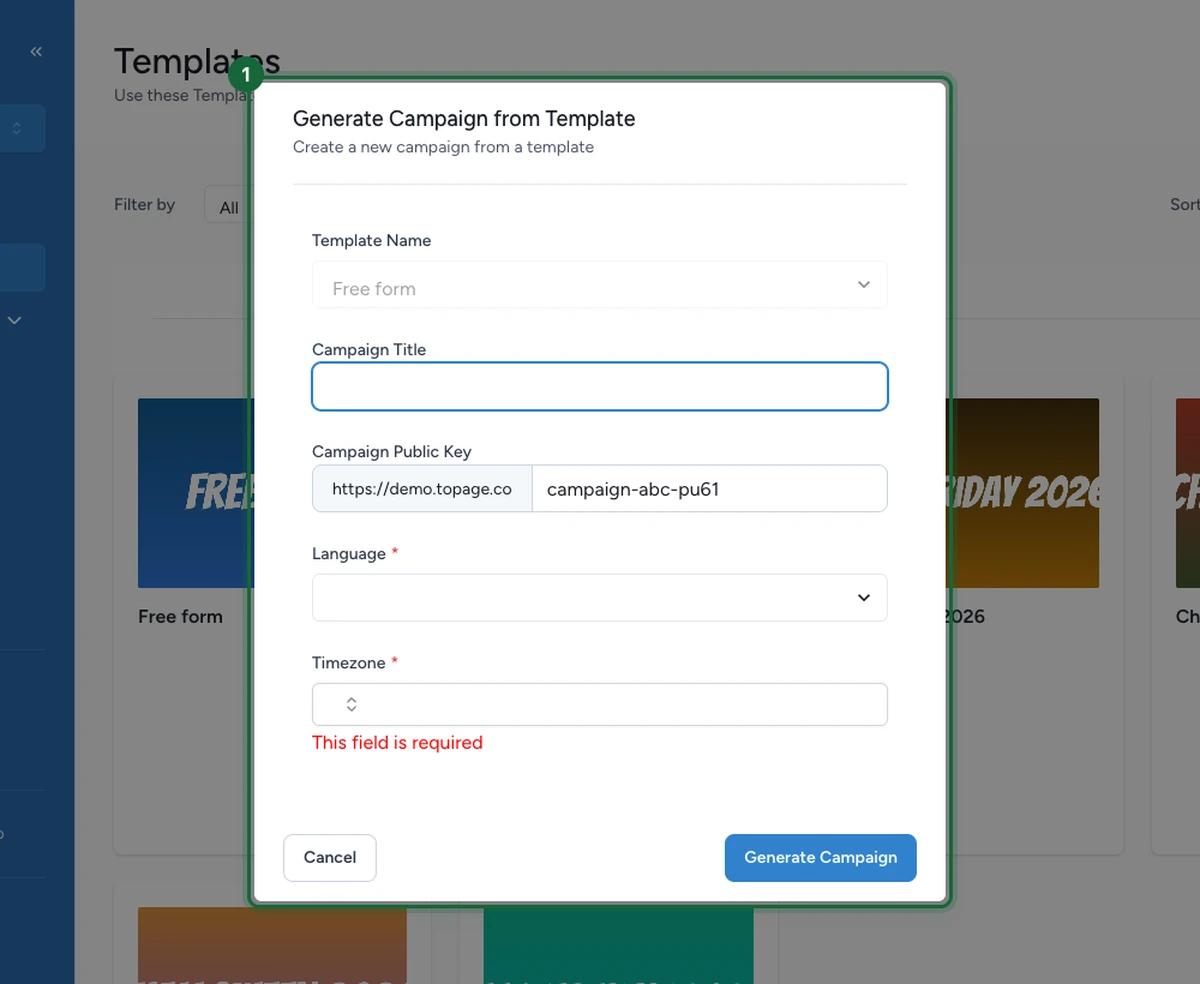
In OmniLab Studio, open Campaigns and start a new campaign. Many teams begin from a ready-made template: open the Templates page, pick a template, and the Generate Campaign from Template dialog opens.
Fill in the campaign basics:
- Campaign Title — the internal name you'll recognise in the list.
- Campaign Public Key — the short, readable part of the campaign's web address. Keep it unique.
- Language and Timezone — set both to match the audience you are targeting. The timezone controls when your dates take effect, so check it even when you start from a template.
Then select Generate Campaign to create it.
Set the campaign dates
Open Settings and set the campaign start date and end date. These dates define the overall operating window for the whole campaign, so get them right before you add anything per-touchpoint later.
Add a Wheel of Fortune touchpoint
Open Touchpoints, select Add New Touchpoint, and choose Wheel of Fortune from the touchpoint picker. A touchpoint is the part of the campaign people actually play, scan, or open — here it's the spinning wheel players will see in OmniLab Pages.

Configure only the minimum wheel details
Give the wheel a clear, player-facing title and keep the rest of the setup light. You only need enough to make the experience understandable in a test run — you can refine the appearance and rules later.
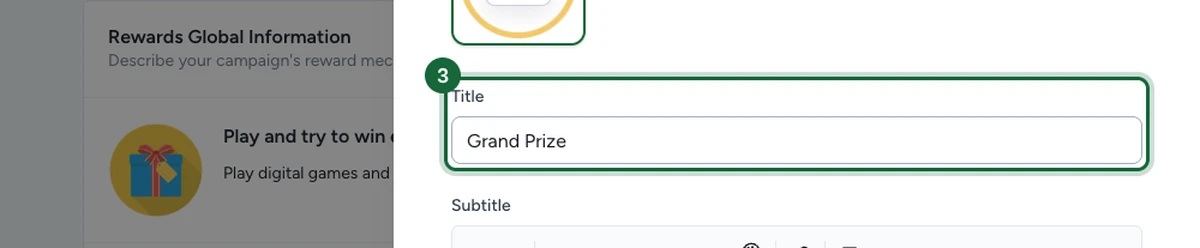
Create one simple reward
Open Rewards and add a single reward for the wheel. At minimum, fill in the reward Title (for example, Grand Prize) so validation has the basics it needs. You can add a subtitle, icon, quantity, and winner message as you go.
Link the reward to the wheel
Return to the wheel touchpoint and link the reward you just created. Rewards are created once for the campaign, then linked to the touchpoints that should hand them out.
Leave advanced options off for now
Keep terms and consent, participation forms, and notifications turned off for this first pass. This campaign is about understanding the core flow, not covering every production requirement.
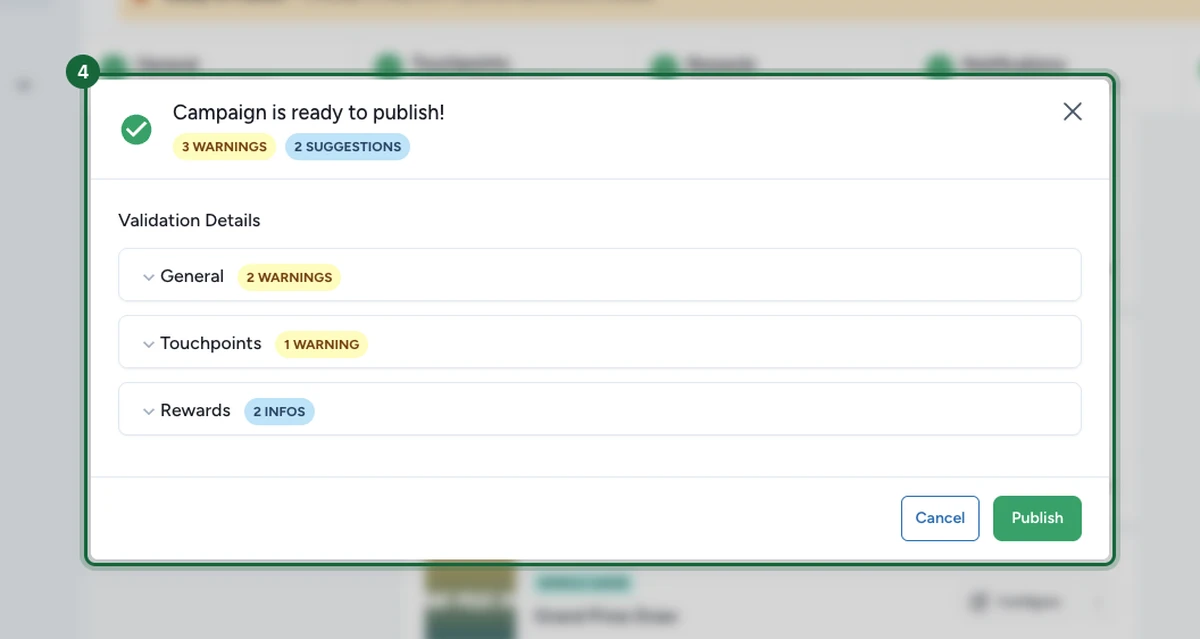
Review validation, then publish
Select Publish to run OmniLab's validation checks. The summary tells you whether the campaign is ready and groups any Warnings and Suggestions by area — General, Touchpoints, and Rewards. Warnings and suggestions don't block publishing; expand a section to see the detail.
When the dialog shows Campaign is ready to publish!, select Publish to take it live in OmniLab Pages.
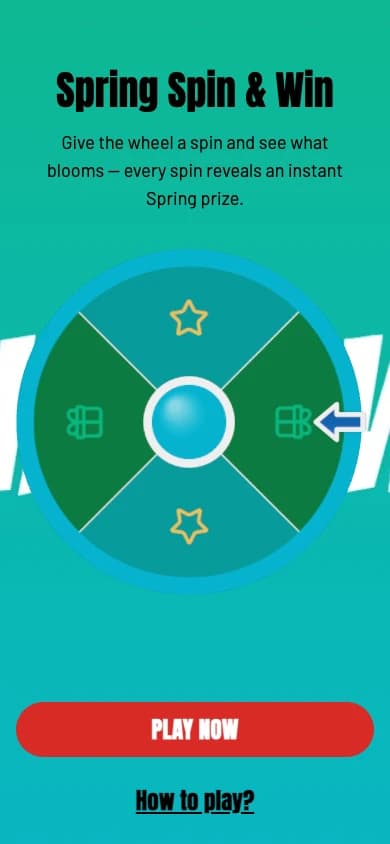
Open the test link and play once
Go back to Touchpoints, then use Share or Preview on the wheel touchpoint to open the live URL or QR code in OmniLab Pages. Play through the wheel once to confirm the touchpoint, the reward, and the full experience behave as expected.
- When the campaign uses a landing page: open the landing-page URL or QR code instead of the direct touchpoint link.
If something's blocked
A few common reasons publishing or testing doesn't work yet, and how to fix them:
- The campaign dates are missing or invalid — open Settings and set a valid start and end date.
- No touchpoint has been added — open Touchpoints and add your Wheel of Fortune.
- The reward is empty — open Rewards and give it at least a title.
- The reward isn't linked — open the wheel touchpoint and link the reward to it.
Result
You now have a first published campaign with one touchpoint, one reward, and a live test URL. That's enough to understand the basic OmniLab Studio-to-OmniLab Pages flow before you add consent, forms, notifications, or more complex reward logic.
What to learn next
In production, you will usually add:
Opt-in & Consent
Enable terms, consent text, and the right scope for participation.
Forms
Choose when to collect participation data and when to use an acquisition form.
Rewards
Expand from one test reward to real winning logic and redemption flows.
Notifications
Send participant emails such as winner, loser, or booking notifications.
Deployment
Choose how the campaign reaches users through URLs, embedding, or QR codes.