Wheel of Fortune
Build a spinning prize wheel: design the slices, create and link a reward, set the winning and losing outcomes, and publish.
Run a prize wheel where players spin to win. You'll add the touchpoint, set up its appearance, design the wheel slices in the visual builder, create the reward a winner receives, configure the winning and losing outcomes, and publish.
Prepare your wheel images first
The builder needs a Pointer Image before it will save, and the wheel looks best with a Background Image, a Border & Center Image, and an optional Segment Image per slice. Generate or prepare these before you start so the build flows without interruption.
Before you begin
Assets you'll need
The wheel reuses the shared game visuals and adds three of its own. Each card shows the exact size, the format, and where the asset appears in the experience.
Background Image
OptionalThe full-screen visual behind any game (wheel, scratch, reveal, quiz, and more).
- Optional
- Size1536 × 2048 px
- Aspect ratio3:4
- FormatsJPEG / WEBP / PNG
Pointer Image
RequiredThe marker at the edge of the wheel that points to the winning slice.
- Required
- Size100 × 100 px
- Aspect ratio1:1
- FormatsPNG
Use a square PNG with a transparent background — it is stretched to a square.
Segment Image
OptionalAn optional icon shown inside a slice — one image per prize.
- Optional
- Size256 × 256 px
- Aspect ratio1:1
- FormatsJPEG / WEBP / PNG
A square PNG with a transparent background scales cleanly into each slice.
Border & Center Image
OptionalA single overlay that adds the outer ring and the center hub of the wheel.
- Optional
- Size500 × 500 px
- Aspect ratio1:1
- FormatsPNG
Use a square PNG with a transparent middle so the slices stay visible.
Thumbnail Image
OptionalThe square tile shown in carousels and campaign listings — not on the play screen.
- Optional
- Size800 × 800 px
- Aspect ratio1:1
- FormatsJPEG / WEBP / PNG
For every image spec in one place, see Image & asset specs.
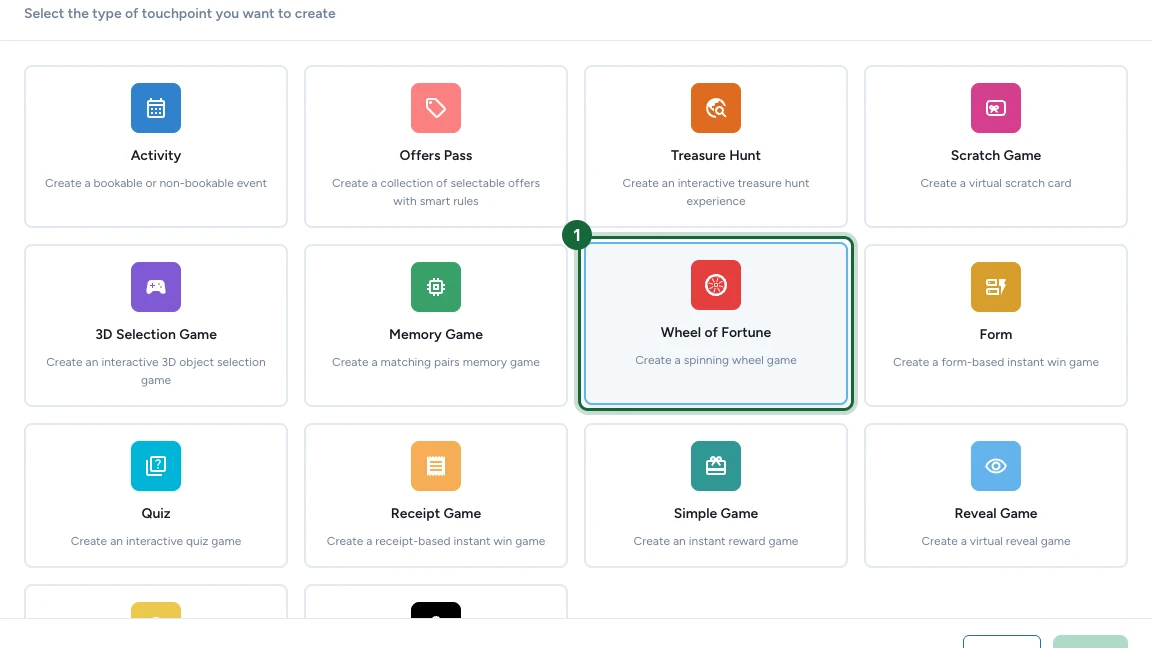
Add the wheel touchpoint
Choose the Wheel of Fortune game type
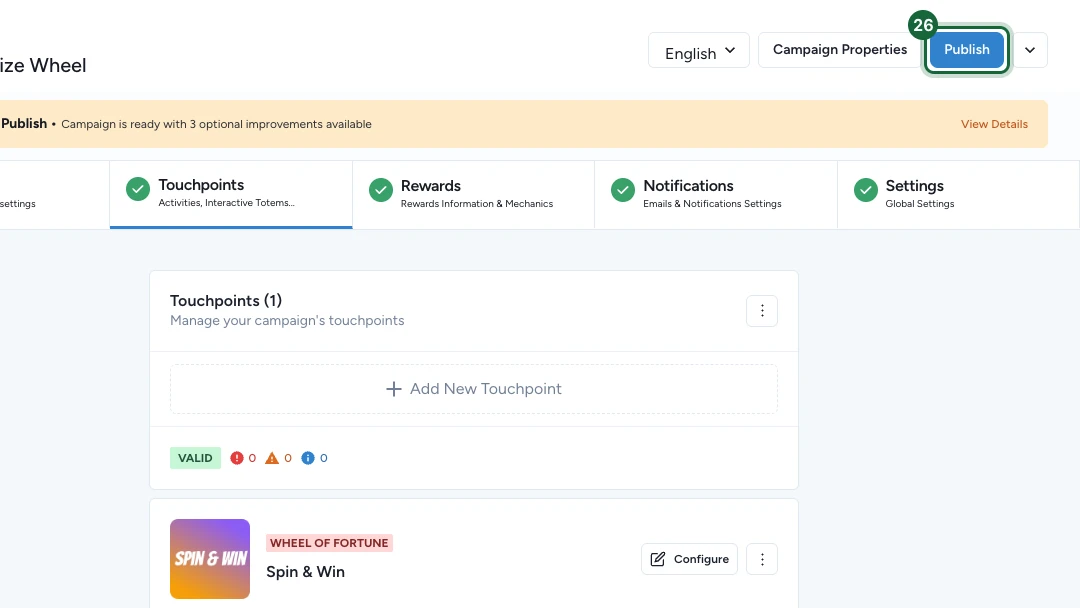
On the Touchpoints tab, select Add New Touchpoint, then choose Wheel of Fortune from the type picker and select Create.
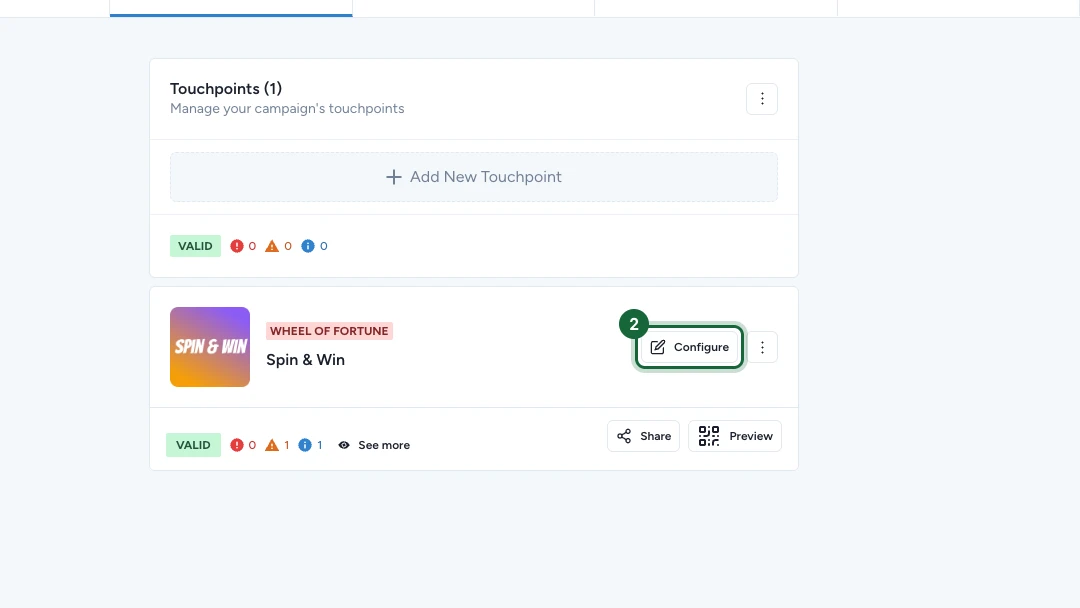
Open the touchpoint
In the Touchpoints list, select Configure on the new wheel touchpoint to open its settings. Give it a clear internal name — that name is what validation messages point to when something needs fixing.
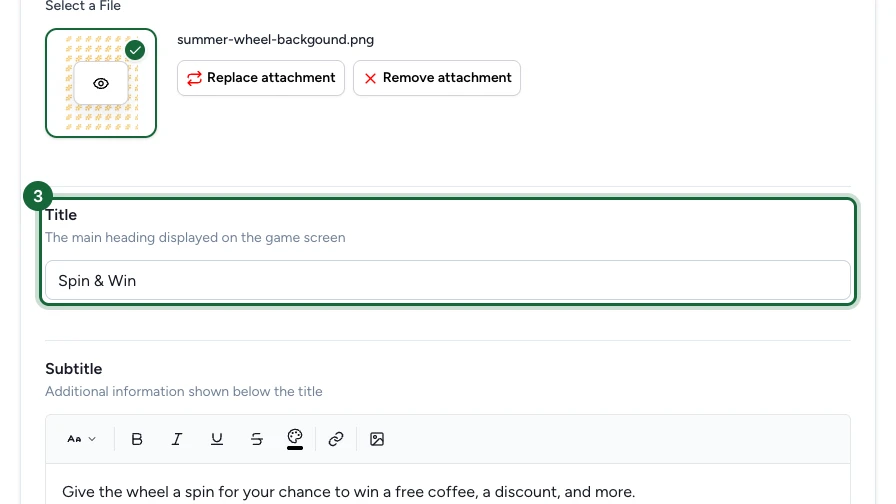
Set up the appearance
Add the title
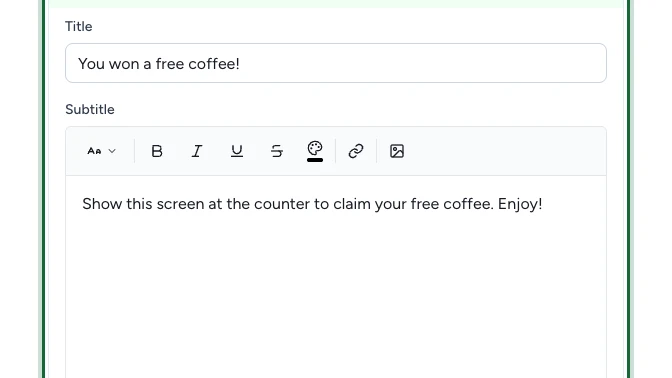
On the Appearance tab, write the Title players read on the game screen. Keep it short — it's the first thing they see.
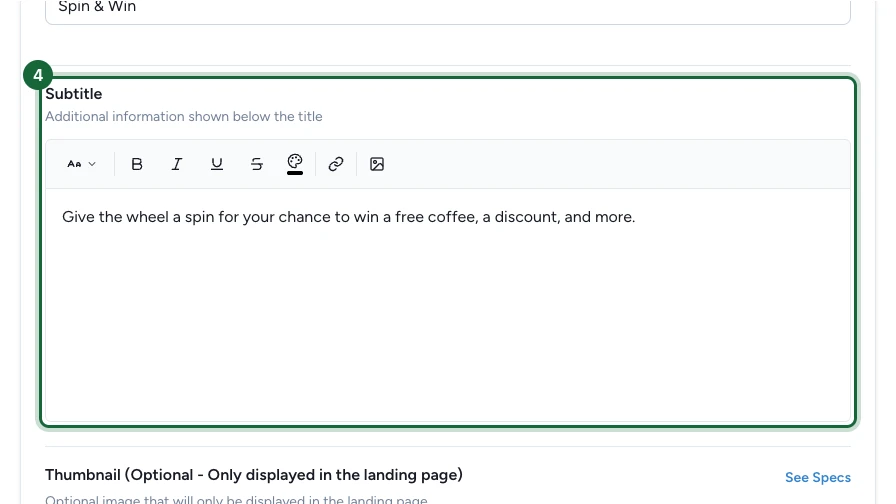
Add the subtitle
Write the Subtitle shown under the title. Use it to tell players what they can win — it's your one line of sell.
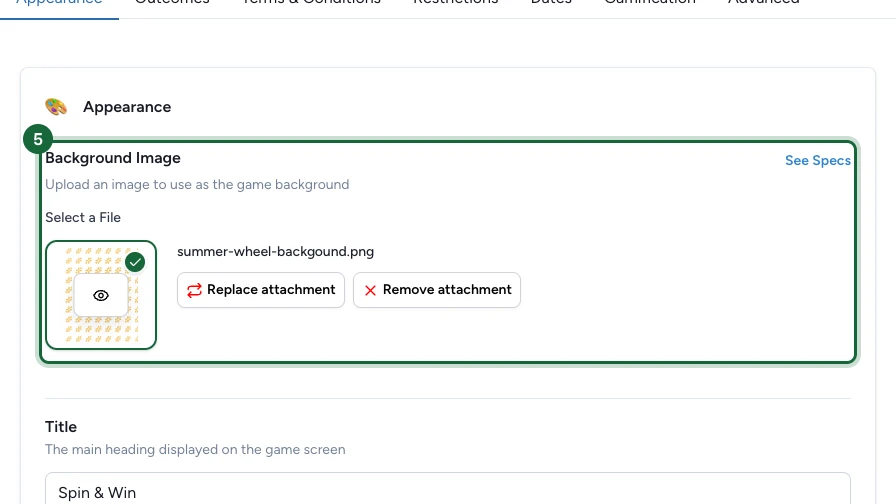
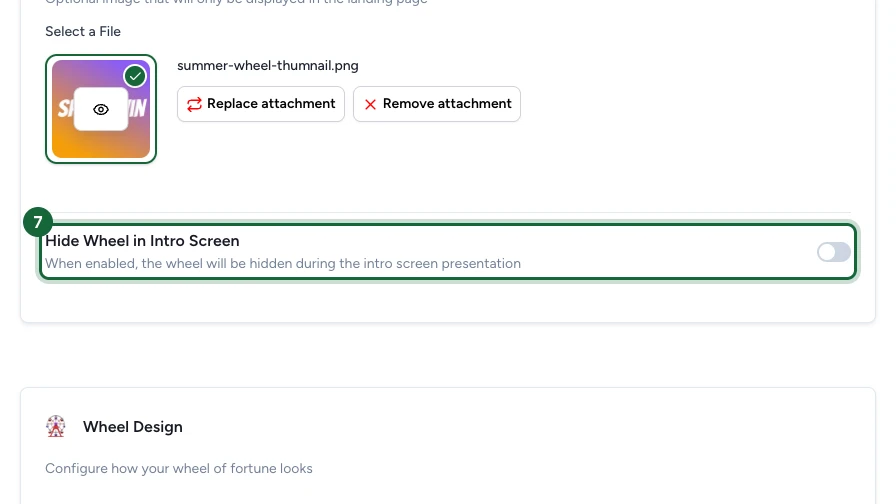
Upload the thumbnail
Upload the Thumbnail. It's listed as optional because it only shows on the landing page, but it also serves as the touchpoint image — without one the campaign won't publish.

Set the intro screen behavior
Turn on Hide Wheel in Intro Screen to keep the wheel hidden until players tap to start, so the first screen focuses on your headline. Leave it off to show the wheel right away.
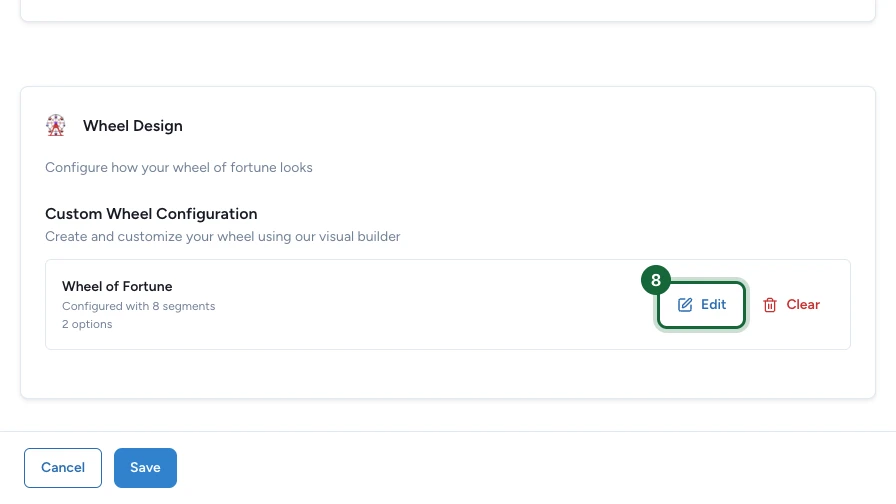
Open the visual wheel builder
Scroll to Wheel Design and select Configure Wheel of Fortune to open the visual builder (on a wheel you already built, the button reads Edit).
Design the wheel
The builder shows a live preview on the left and the settings on the right. As you add options and segments, the preview updates so you can see the wheel take shape.
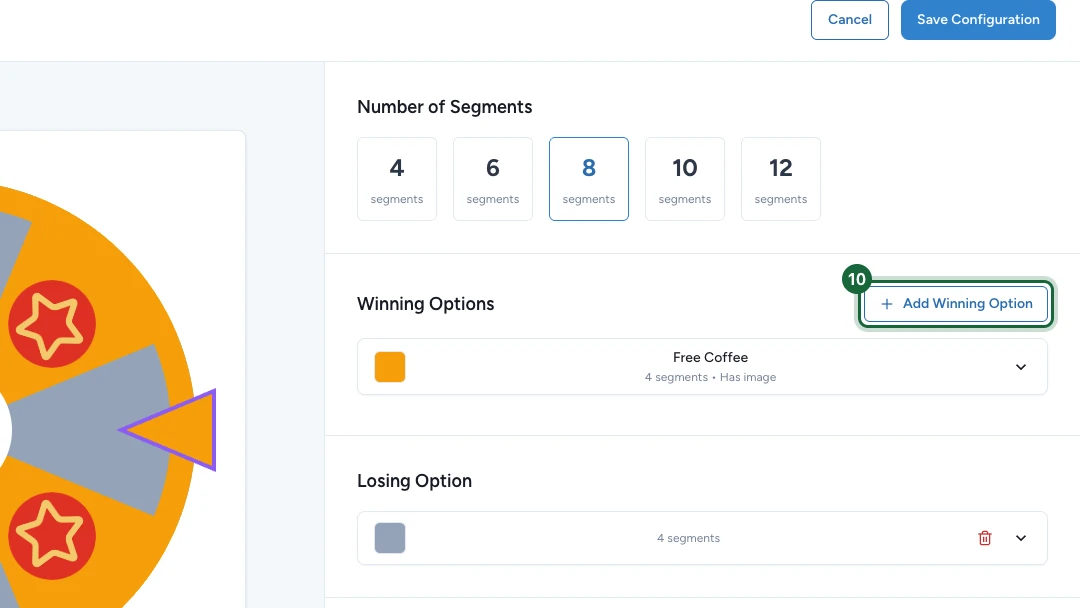
Choose the number of segments
Under Number of Segments, pick how many slices the wheel shows: 4, 6, 8, 10, or 12. You'll split these slices between your winning options and the losing option.
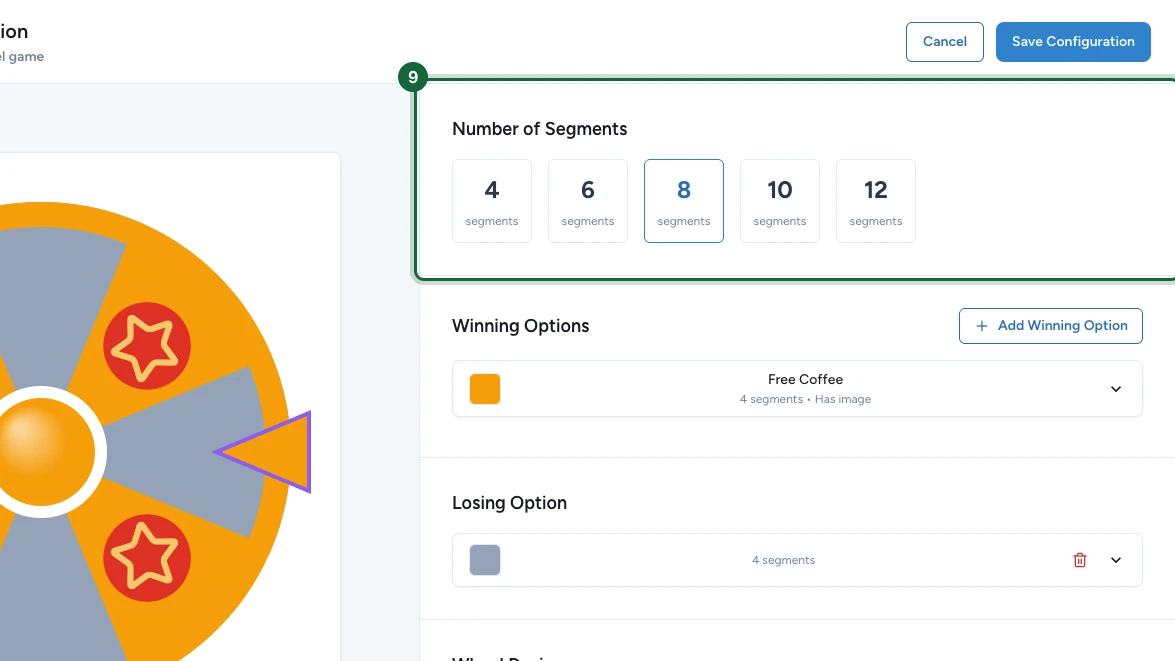
Add a winning option
Under Winning Options, select Add Winning Option for each prize. Each winning option becomes one or more slices on the wheel.
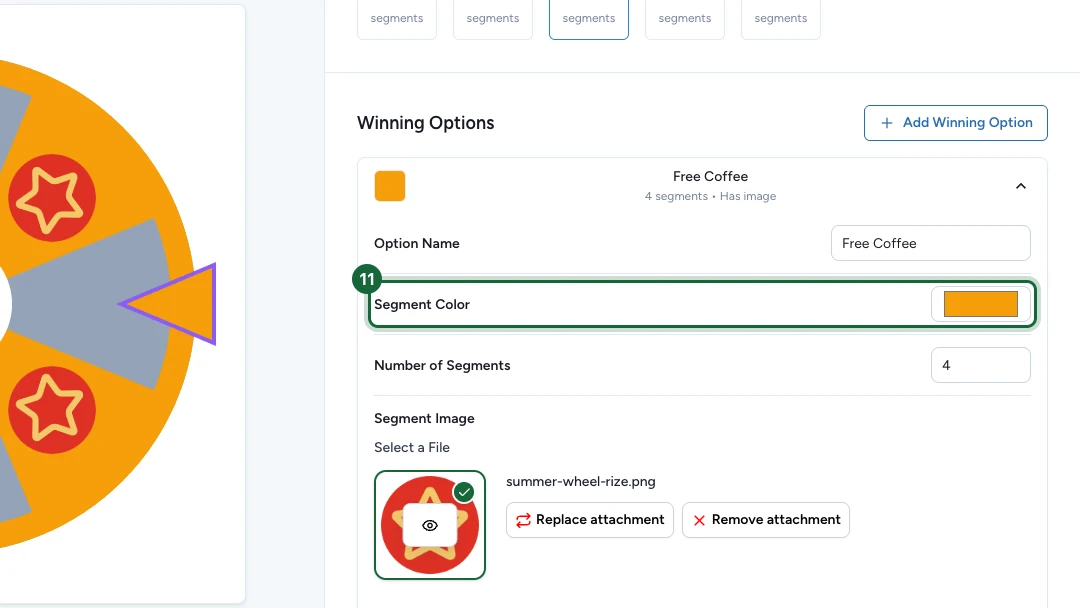
Configure the winning option
Expand the option and fill in its four settings:
- Option Name — the prize, as players will know it.
- Segment Color — the slice color on the wheel.
- Number of Segments — how many slices point to this prize. More slices doesn't change the odds (you set those later in Outcomes); it changes how often the prize appears on the wheel.
- Segment Image — optional artwork shown on each of this option's slices.
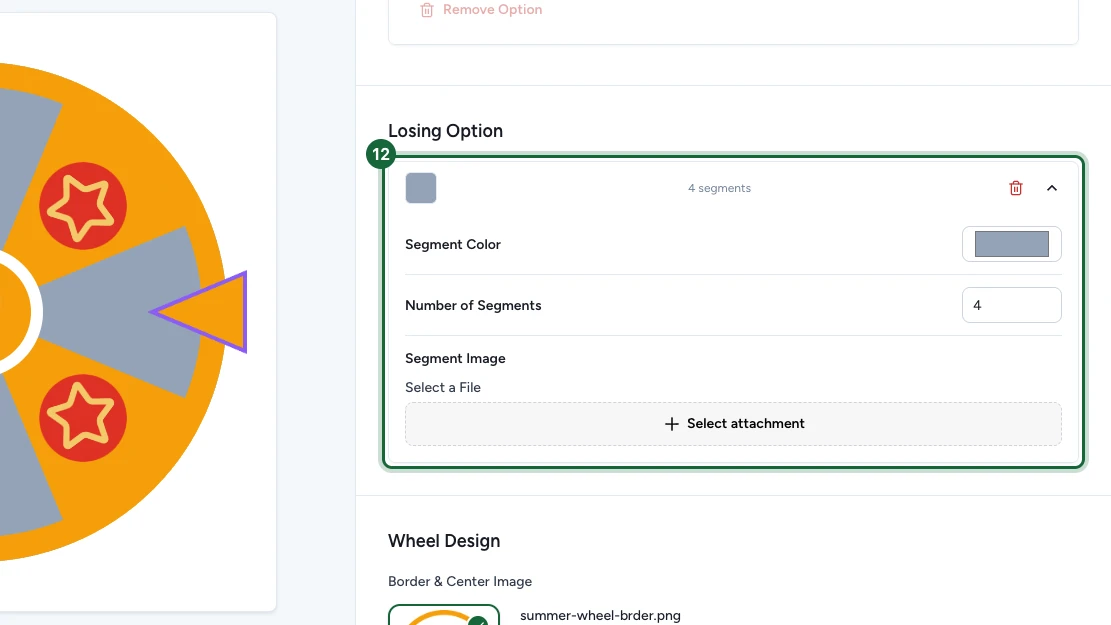
Set the losing option
In Losing Option, set the Segment Color and the Number of Segments the losing slices take (the losing option has no name field — the wheel knows it's the losing one). The winning and losing segment counts must add up to the wheel's total — here, 4 + 4 = 8.
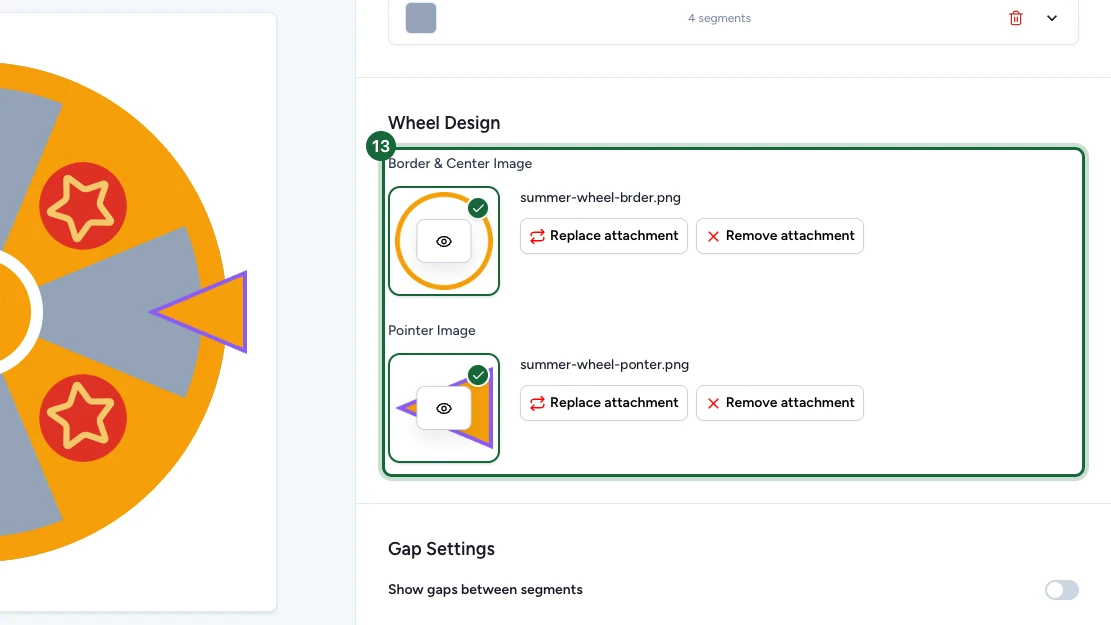
Upload the pointer and border images
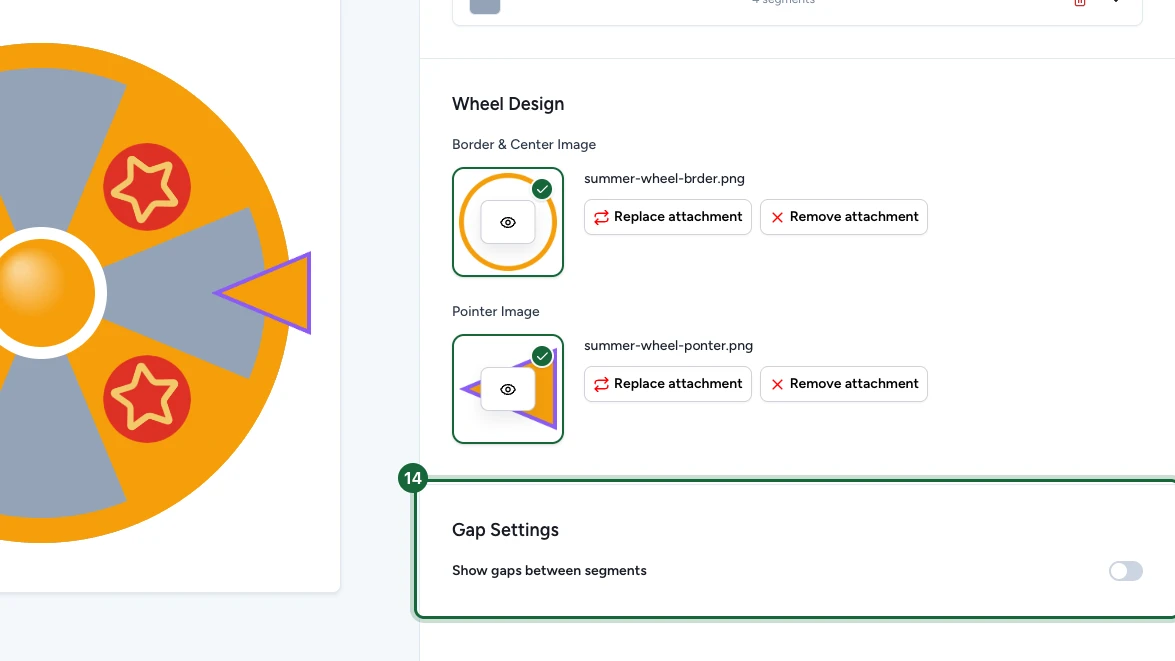
Under Wheel Design, upload the Pointer Image that marks where the wheel lands — this is required before you can save. Add an optional Border & Center Image for a more branded wheel.
Fine-tune the gaps (optional)
Turn on Show gaps between segments to separate the slices visually, then set the Gap Color and Gap Size.
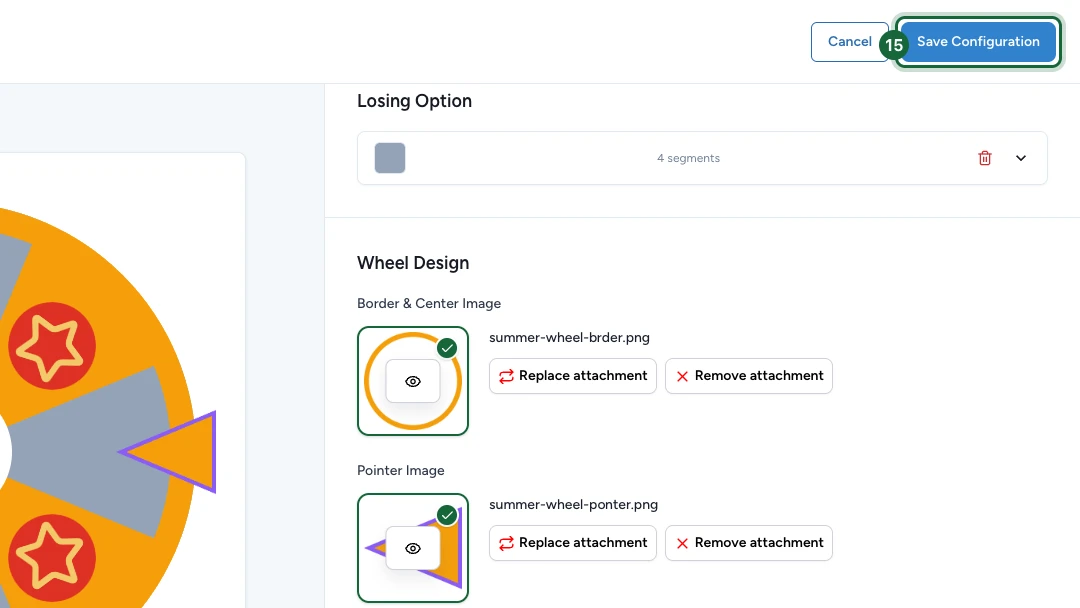
Save the wheel configuration
When the segment counts add up and the pointer image is set, select Save Configuration. This builds the wheel and returns you to the touchpoint.
Create the reward
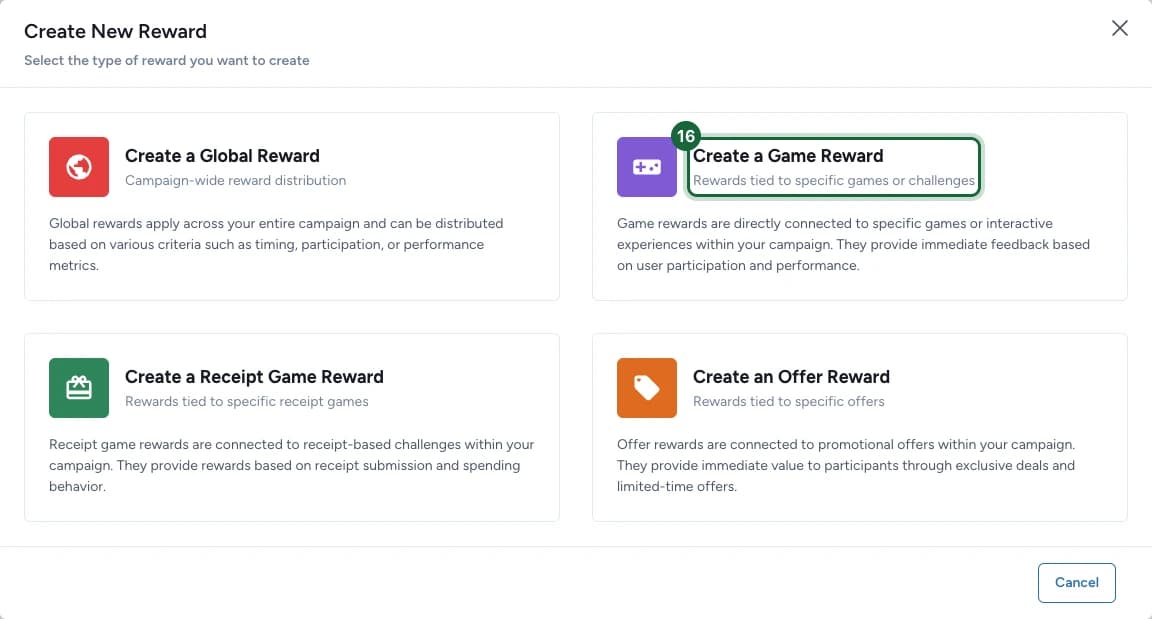
Before you can link a prize to a winning slice, the reward has to exist. Create it on the Rewards tab.
Add a game reward
On the Rewards tab, select Add New Reward, then choose Create a Game Reward — the reward type that connects to a game like your wheel.
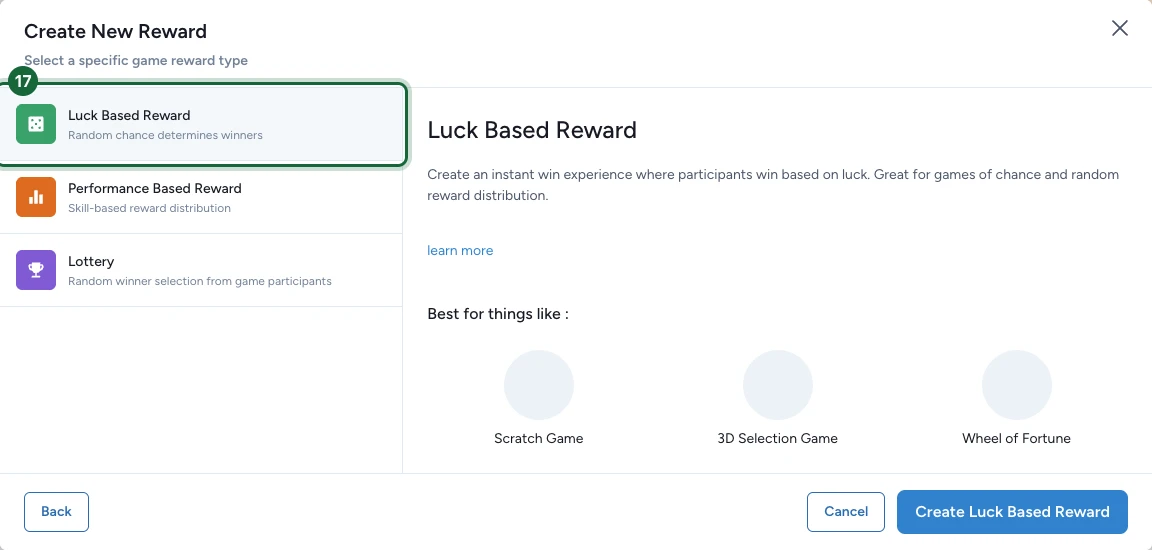
Choose Luck Based Reward
Select Luck Based Reward — the real-time prize a wheel awards based on chance — then select Create Luck Based Reward.
Write the reward's winner message
Open the new reward with Configure, fill in its title, icon, and quantity, then expand User Messages → Messages for Winners and write the winner Title and Subtitle. Both are required — a reward without a winner message blocks publishing. For the full reward options, see Create a reward.
Configure the outcomes
The outcomes are the heart of the game
This is where you decide what players win and lose. Configure both the winning option and the losing outcome — a wheel with only one is incomplete.
Choose how winners are determined
Back on the touchpoint, open the Outcomes tab and set How Winners Are Determined. The mode you pick changes how the rest of the tab works:
- Random Chance — every player has a set percentage chance to win. Configure each option's probability (covered next).
- Scheduled Rewards — distribute rewards on specific days and times, regardless of odds. Covered further down.
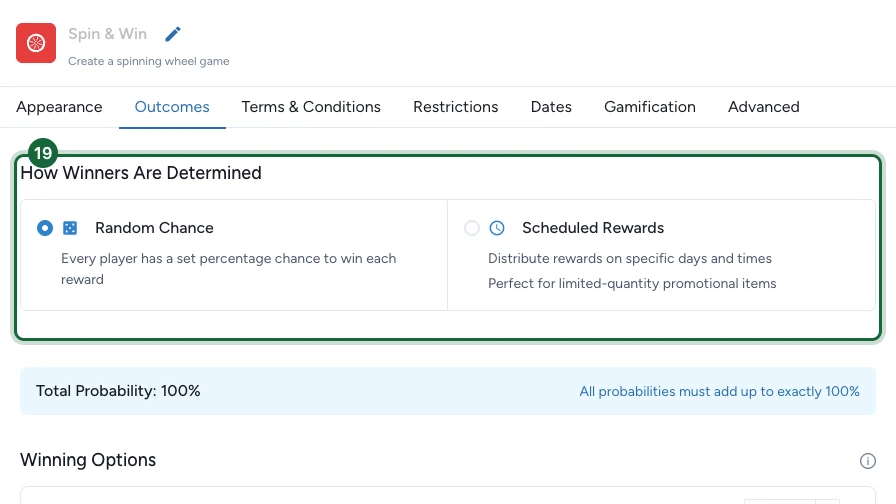
Option A — Random Chance
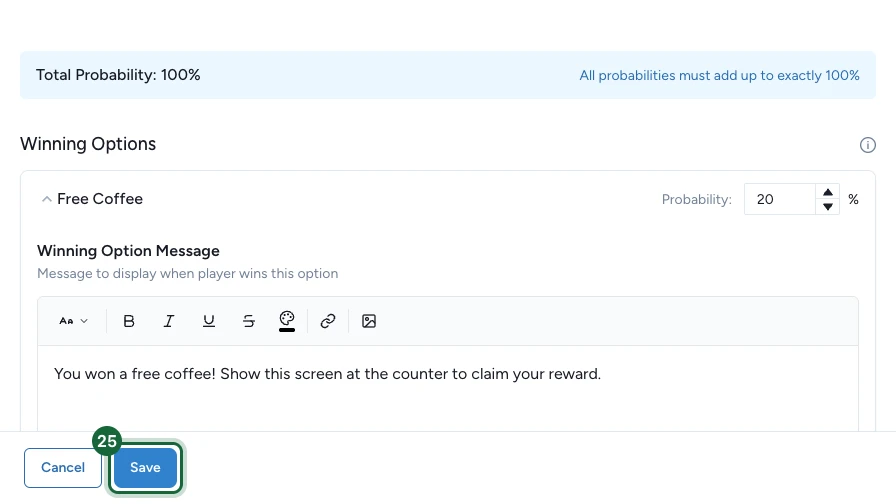
With Random Chance, each option carries a Probability, and the winning and losing probabilities must total 100 — the Total Probability banner at the top of the tab tracks it for you.
Set the winning probability
Expand the winning option and set its Probability — the percentage chance a player wins this prize on each spin.
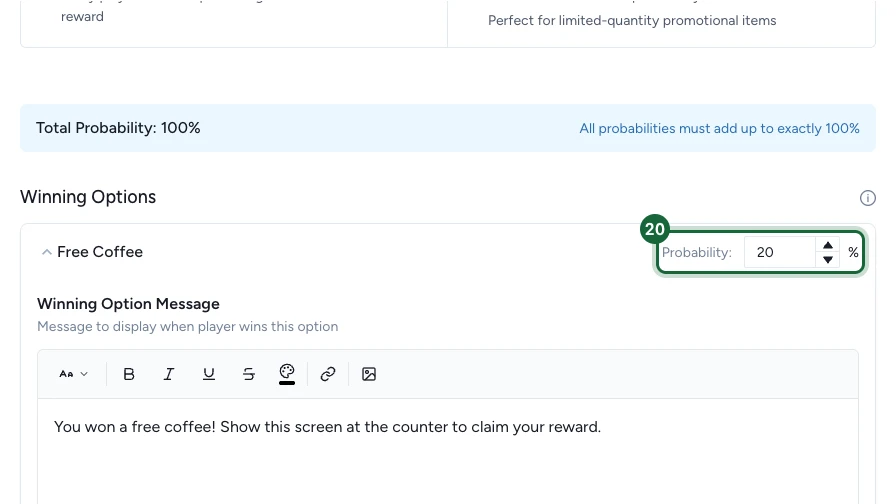
Write the winning message
Write the Winning Option Message players see the moment the wheel lands on this prize.
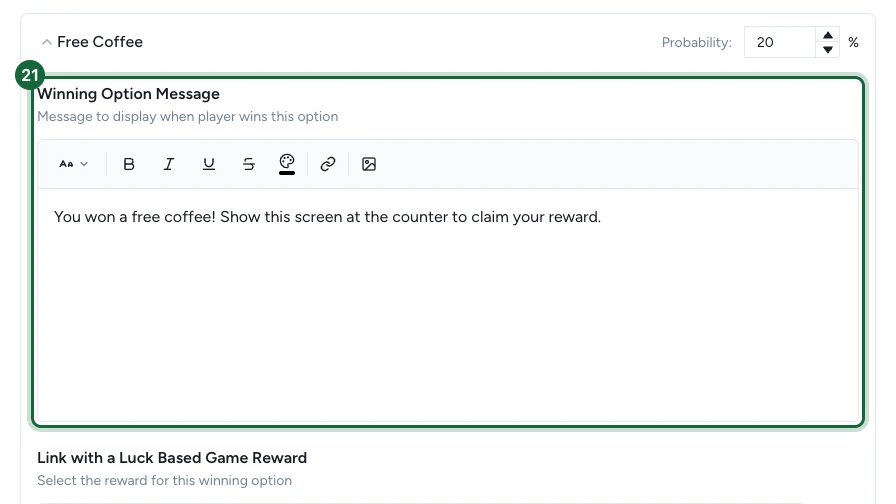
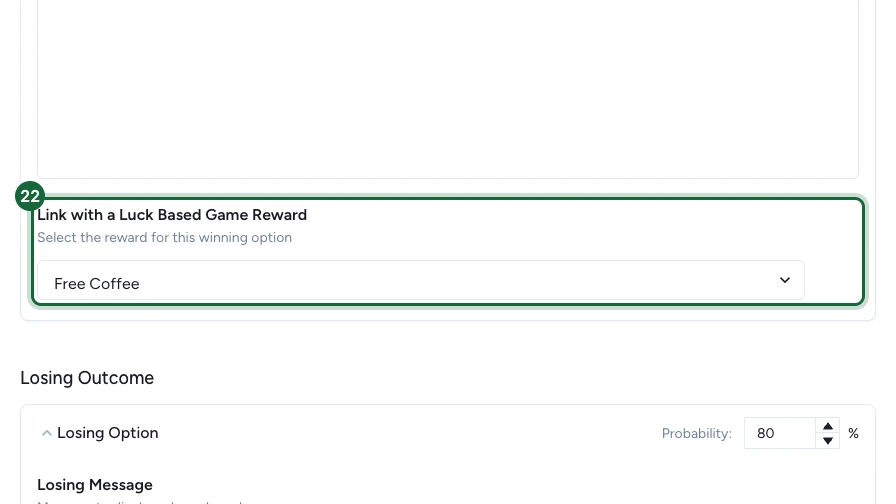
Link the reward
Under Link with a Luck Based Game Reward, select the reward you created earlier. This is the link that makes a win actually grant the prize — a winning option without a linked reward blocks publishing.
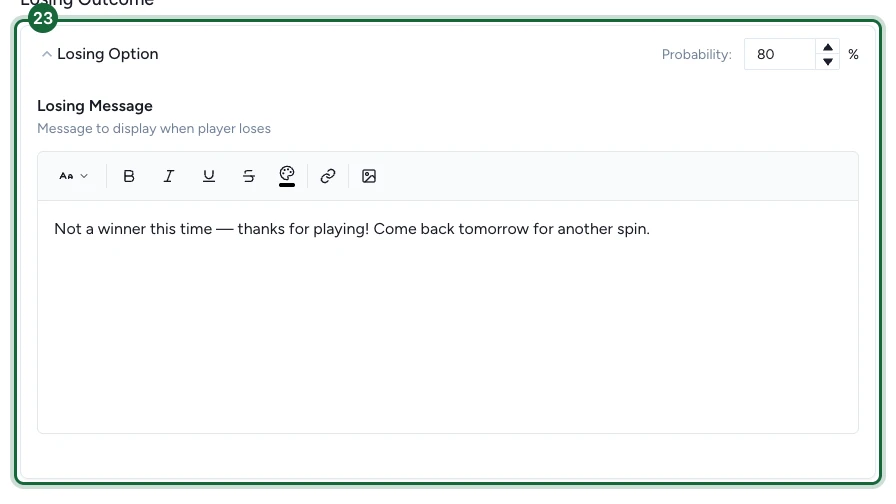
Set up the losing outcome
Expand the Losing Outcome, set its Probability, and write the Losing Message shown to players who don't win. Confirm the total reads 100% at the top of the tab.
Option B — Scheduled Rewards
Prefer to release prizes on a timetable instead of by odds? Set How Winners Are Determined to Scheduled Rewards. The probability fields disappear and a Rewards distribution panel appears instead.
Set the distribution window
Choose a distribution Type (Simple or Advanced) and a start and end date. OmniLab spreads the winning moments randomly across that window. These dates control only when prizes are won — to control when players can play, use the Dates tab.
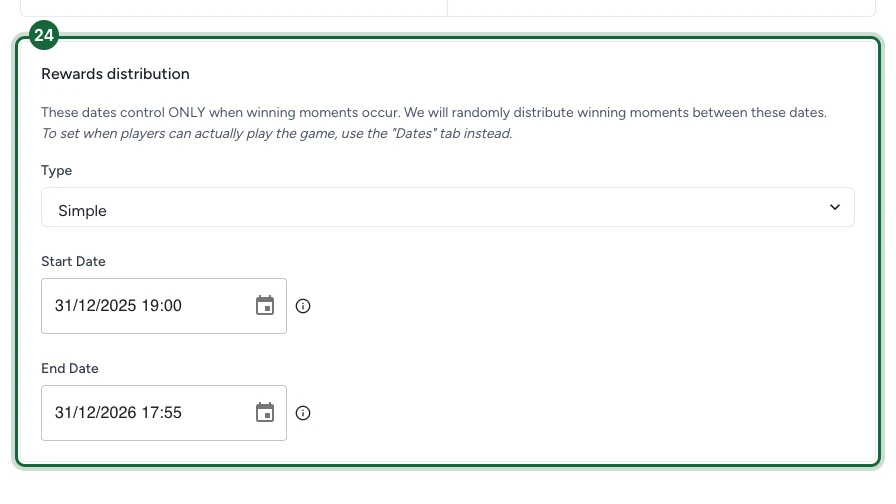
In Advanced mode, you assign exact quantities to specific time slots inside each winning option. See Attribution slots.
Save and publish
Save the touchpoint
Select Save at the bottom of the touchpoint panel. The builder's Save Configuration only prepares the wheel — this Save is what persists everything you configured.
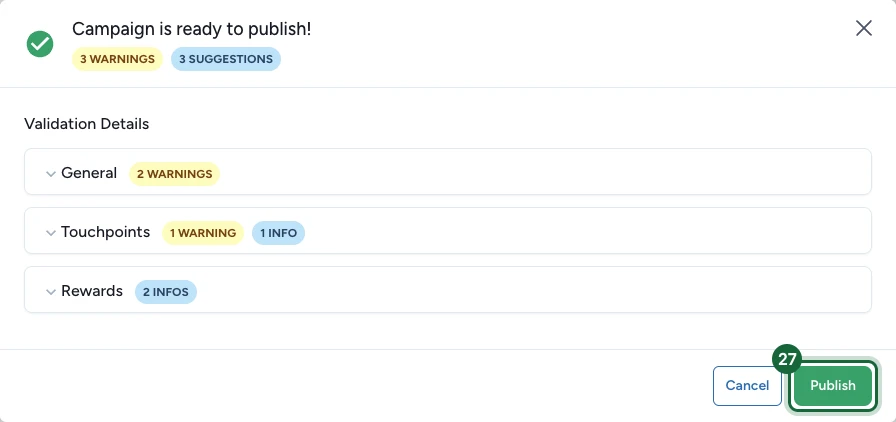
Confirm in the publish dialog
The dialog sums up the validation state. When it reads Campaign is ready to publish!, select Publish — warnings and suggestions are optional improvements, only errors block. The campaign goes live and players can start spinning.
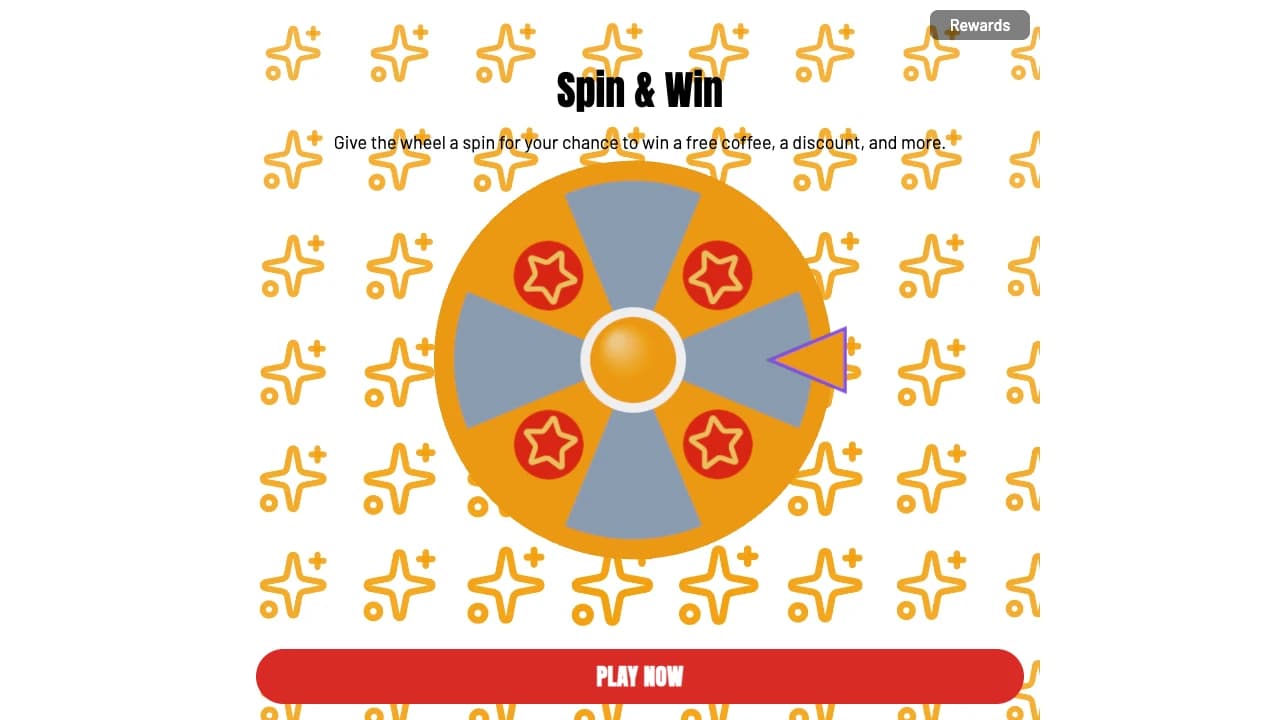
What players see
Players land on a branded page with your title, subtitle, and wheel — exactly the design you saved in the builder, pointer and all. When the intro screen is on, the wheel stays hidden until they tap to start. They spin, the wheel lands on a slice, and OmniLab shows the message and reward linked to that result — instantly.
If publishing is blocked
A few common reasons and how to fix them:
- The pointer image is missing — open the wheel builder and upload the Pointer Image, then Save Configuration again.
- The segment counts don't add up — the winning and losing Number of Segments must total the wheel's segment count.
- The thumbnail is missing — the touchpoint needs its Thumbnail image on the Appearance tab.
- The odds don't total 100% — in Random Chance, open Outcomes and adjust the probabilities until they total 100.
- No reward is linked — every winning option needs a luck-based reward selected under Link with a Luck Based Game Reward.
- The reward has no winner message — open the reward on the Rewards tab and add a winner title and subtitle under User Messages.
If the wheel still won't validate, reopen the builder and Save Configuration again — that also rebuilds the wheel image used by OmniLab Pages — then Save the touchpoint.
Configure the shared settings
Beyond appearance, the wheel, and outcomes, this game shares the standard touchpoint settings. Configure the ones your campaign needs:
Appearance and branding
Deep dive into titles, backgrounds, and thumbnails shared across game types.
Outcomes
How winning and losing options work across luck-based games.
Link rewards to a game
Connect the reward each winning slice grants.
Restrictions
Limit plays per person, per day, or by time window.
Opt-in
Collect consent and show terms before players take part.
Participation form
Ask players for extra information when they play.
Notifications
Email players about their result.
Dates
Give this game its own availability window.
Gamification
Award a badge for playing.
What to try next
Test your game
Play the published wheel as a participant before launch.
Your first game in 15 minutes
Follow a full game setup, from campaign creation to first publish.
Instant Win rewards
Set up wheel outcomes that resolve immediately.
Attribution slots
Plan advanced scheduled availability for each winning reward.