Scratch Card
Let players rub away a cover to reveal a branded win or loss underneath.
Run a scratch-card game where players actively rub away a cover image to reveal a branded win or loss visual underneath.
Pick your reveal images first
Each outcome shows the player an image. Prepare a winning image with the prize text and a losing image with a friendly miss message before you open Outcomes, so both results are ready to upload.
Before you begin
Assets you'll need
A scratch card needs one required cover, plus an optional branded back, winning art, and a background. Each preview shows where the asset lands on the play screen.
Background Image
OptionalThe full-screen visual behind any game (wheel, scratch, reveal, quiz, and more).
- Optional
- Size1536 × 2048 px
- Aspect ratio3:4
- FormatsJPEG / WEBP / PNG
Front Image (scratchable)
RequiredThe cover players scratch off to reveal the result.
- Required
- Size1280 × 720 px
- Aspect ratio16:9
- FormatsJPEG / WEBP / PNG
Use a fully opaque image so the prize stays hidden until scratched.
Back Image (branding)
OptionalThe branded surface shown behind the scratchable cover.
- Optional
- Size1280 × 720 px
- Aspect ratio16:9
- FormatsJPEG / WEBP / PNG
Winning Image
OptionalThe reveal art uncovered when the player wins.
- Optional
- Size1280 × 720 px
- Aspect ratio16:9
- FormatsJPEG / WEBP / PNG
Reward Icon
OptionalThe icon that represents a reward.
- Optional
- Size800 × 800 px
- Aspect ratio1:1
- FormatsJPEG / WEBP / PNG
Circular design and a transparent background work best.
For every image spec in one place, see Image & asset specs.
Configure the game
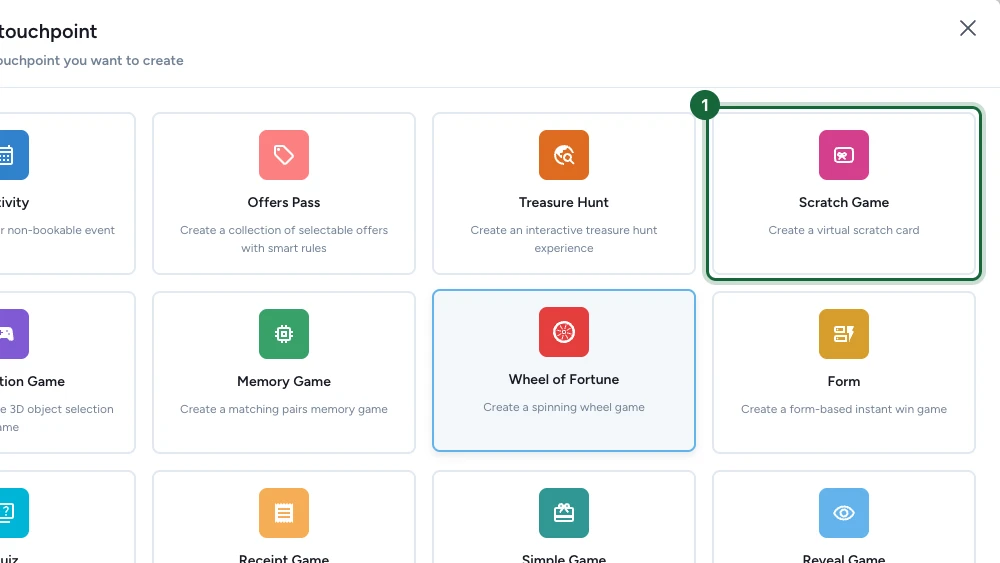
Choose the Scratch Game type
In Build, open Touchpoints, select Add New Touchpoint, then pick Scratch Game from the type grid.
Give the touchpoint a clear internal name. That same name appears in validation messages when something needs fixing.

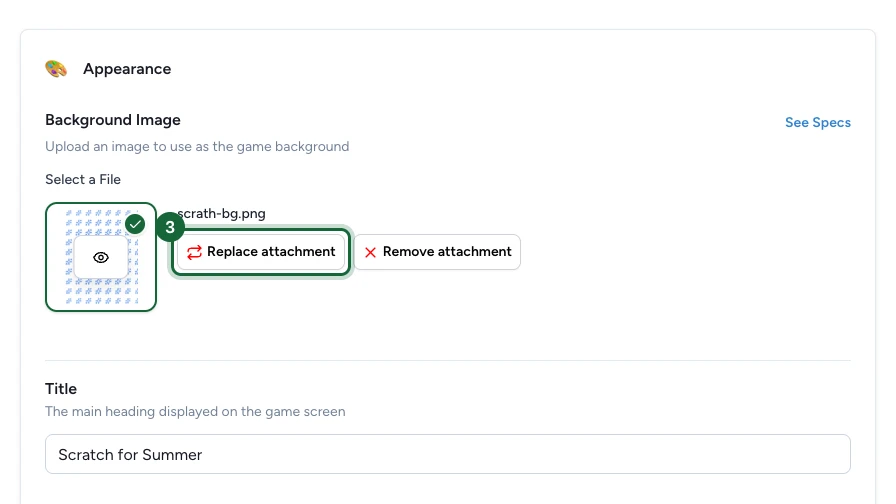
Set the page appearance
Open the Appearance tab and upload the Background Image that frames the play screen.
Add the title and subtitle
Still on Appearance, add the Title and Subtitle players read before they scratch. Use the description field to explain the prize mechanic in advance.
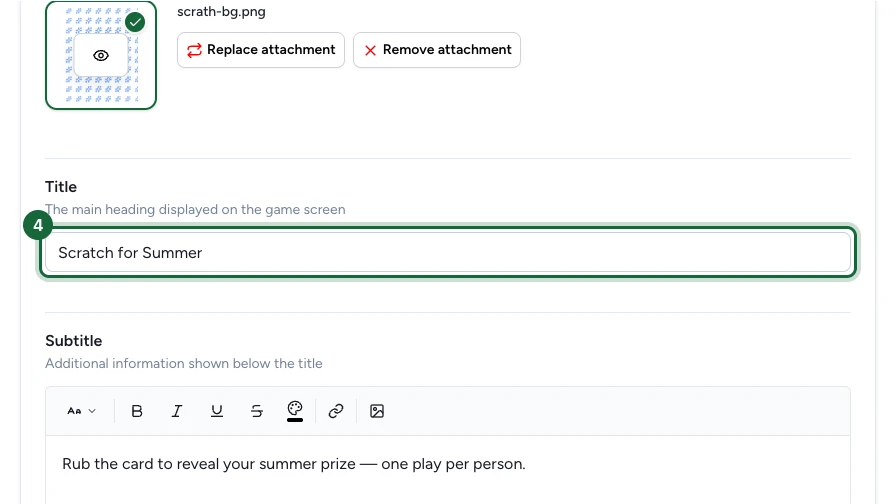
This tab controls the page around the card. The scratchable card itself is built in the next steps.
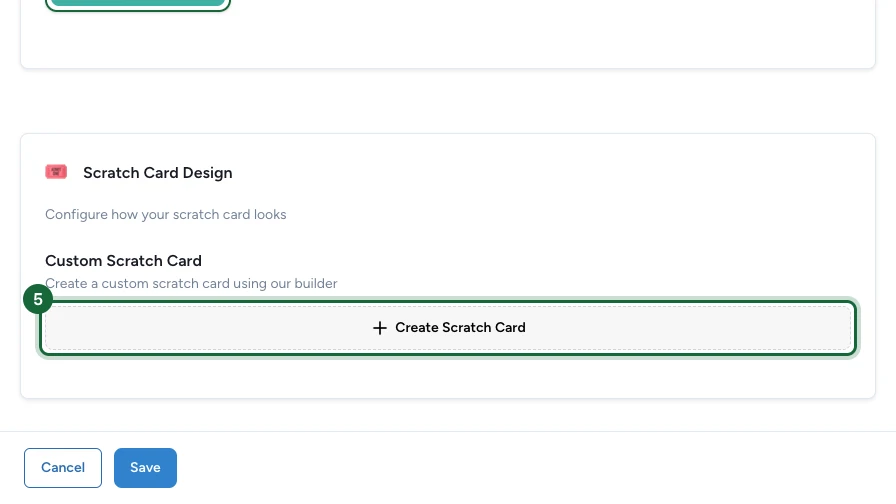
Open the scratch card builder
Scroll to Scratch Card Design and select Create Scratch Card (or Edit Scratch Card if you are updating an existing card).
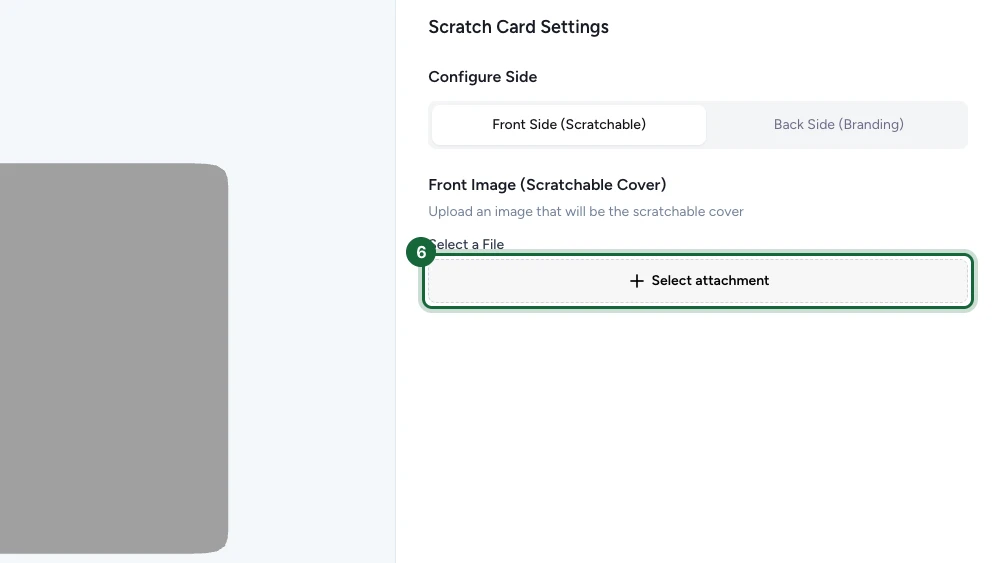
Upload the scratchable cover
In the builder, stay on Front Side (Scratchable) and upload the Front Image (Scratchable Cover) — the layer players rub away.
Switch to Back Side (Branding) to add optional reverse-side art, then return to the front side when you are done.
Save the scratch card
Select Create Scratch Card in the builder to generate the card image OmniLab Pages uses. The Scratch Card Design panel then lists the generated asset and shows Cover Image: Generated.
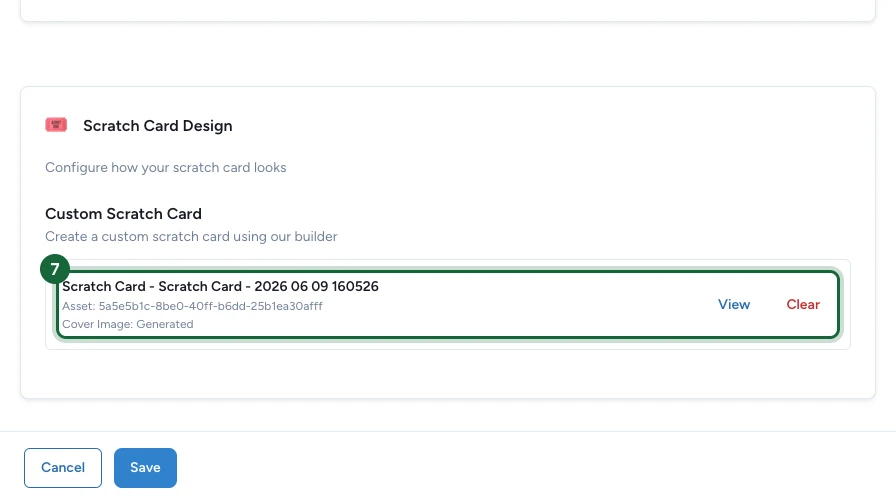
Use View to preview the card or Clear to start over. Prepare each winning and losing reveal image in landscape format so it stays readable in the wide reveal area.
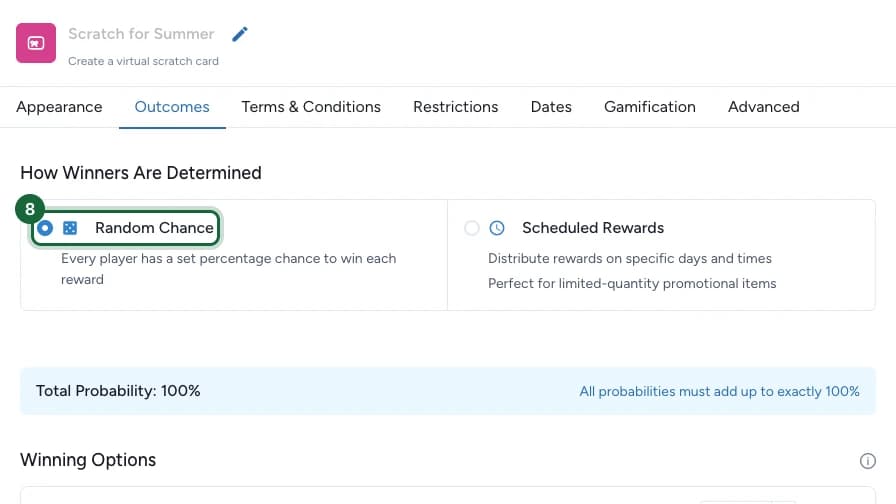
Choose how winners are determined
Open Outcomes. Under How Winners Are Determined, pick the mode that fits your campaign:
- Random Chance — every player has a set percentage chance to win each reward. Use this for fixed odds. The combined total across winning and losing options must equal
100. - Scheduled Rewards — distributes rewards on specific days and times, which suits limited-quantity promotional items. Use this when you want to control timing. Choose Simple for one continuous date range, or Advanced to set up attribution slots after you link each winning reward.
For a delayed draw instead of an immediate reveal, use a game type that offers a lottery, such as Simple / Instant Win or 3D Selection game.
Or schedule the winning moments
Select Scheduled Rewards to distribute wins on specific days and times instead of by fixed odds — ideal for limited-quantity seasonal prizes. A Rewards distribution panel appears: choose Simple for one continuous date range, or Advanced to define attribution slots after you link each winning reward.
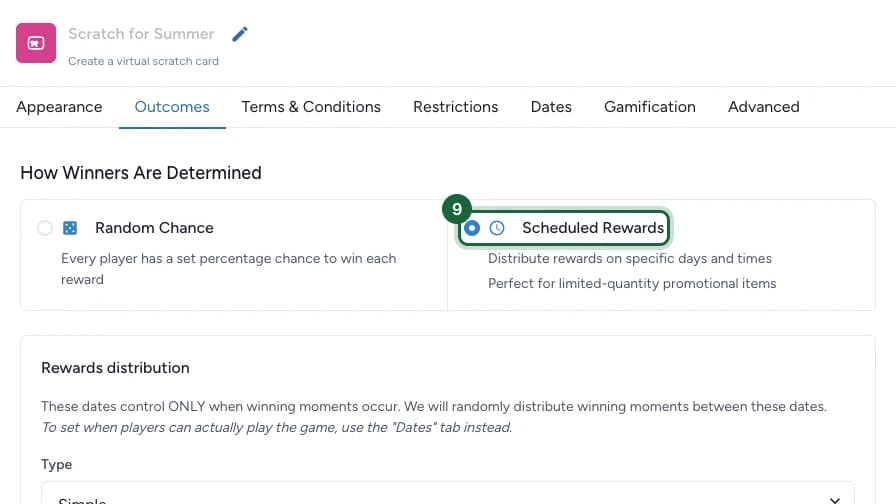
The dates here control only when winning moments occur — use the Dates tab to set when players can actually play. This example keeps Random Chance, so switch back to it before saving if you don't need scheduling.
Configure the winning option
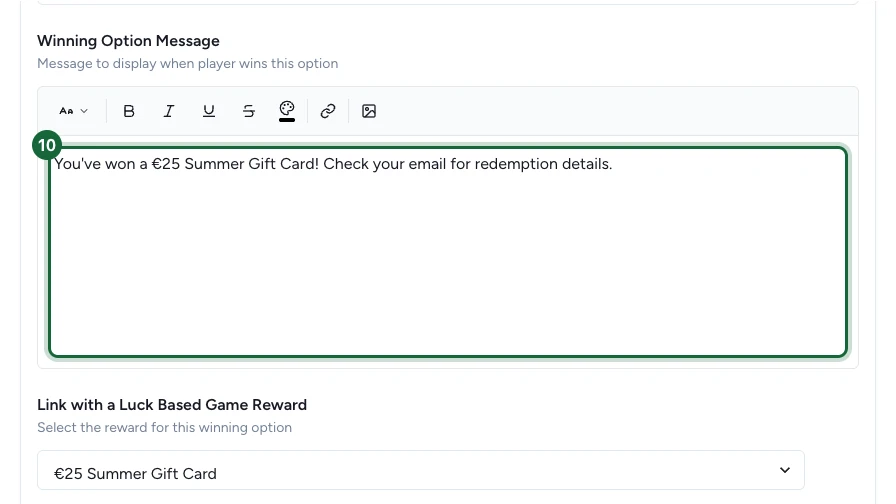
Expand Winning Option 1. Set its Probability, use Configure Option Image to upload the reveal image winners see, write the Winning Option Message, and pick the reward under Link with a Luck Based Game Reward.
Configure the losing outcome
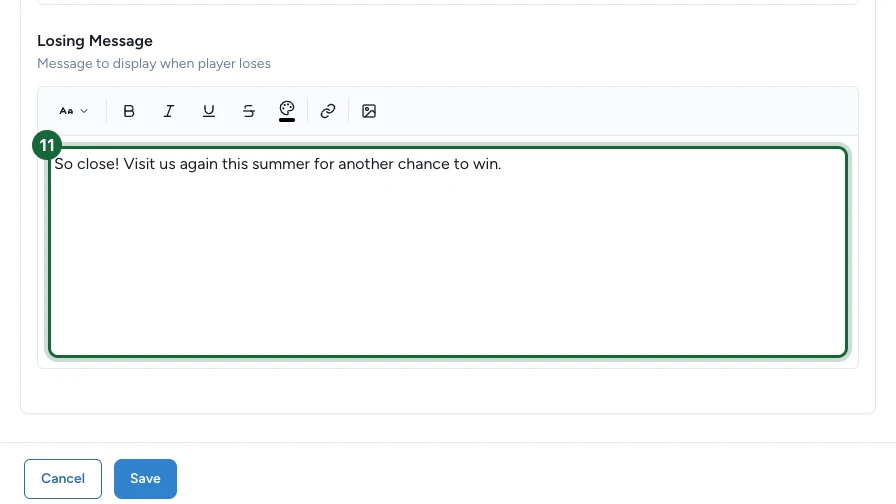
Expand Losing Outcome. Set its Probability, use Configure Option Image to upload the miss image, and write the Losing Message shown when the player does not win.
The winning and losing probabilities must total exactly 100.
Review the shared tabs and test
After Appearance and Outcomes, review the shared tabs as needed: Terms & Conditions, Restrictions, Dates, Gamification, and Advanced.
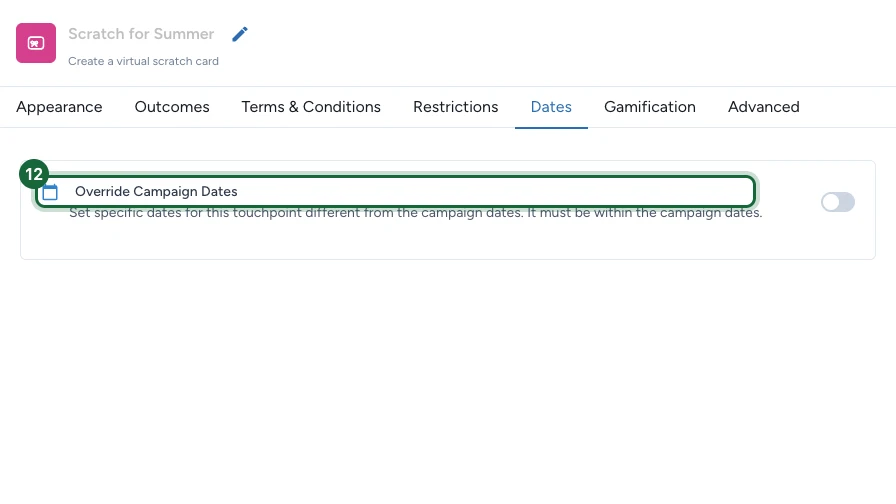
Use the Dates tab for overall play availability. Turn on Override Campaign Dates to give this touchpoint its own window inside the campaign dates. Under Scheduled Rewards, the dates in Outcomes only set when the winning moments are distributed.
Save the touchpoint, open a preview or published page, and test both a winning reveal and a losing reveal before launch.
What players see
Players land on a branded page with the title, subtitle, and optional instructions. Once they start, OmniLab Pages prompts them to scratch the card to reveal their reward.
As the cover is scratched away, the chosen winning or losing image appears underneath. OmniLab then shows the message linked to that result.
If publishing is blocked
A few common reasons and how to fix them:
- The scratch card builder wasn't saved — open Scratch Card Design and save a complete setup before publishing.
- The scratchable cover image is missing — upload the Front Image (Scratchable Cover) in the scratch card builder.
- No generated image exists — save the builder again. That step rebuilds the scratch-card image used by OmniLab Pages.
- A result image is missing — open Outcomes and make sure every winning and losing option has a reveal image.
- The odds don't add up to 100% — open Outcomes and adjust the option weights until they total exactly 100.
- No reward is linked to a winning option — create a luck-based reward in Rewards, then link it to Winning Option 1.
Configure the shared settings
Beyond appearance and outcomes, a scratch card shares the standard touchpoint settings. Configure the ones your campaign needs:
Appearance and branding
Deep dive into titles, backgrounds, and thumbnails shared across game types.
Outcomes
How winning and losing options work across luck-based games.
Restrictions
Limit plays per person, per day, or by time window.
Opt-in
Collect consent before players take part.
Participation form
Ask players for extra information when they play.
Notifications
Email players about their result.
Dates
Give this game its own availability window.
Gamification
Award a badge for playing.
What to try next
About rewards: categories and winning methods
Choose the right reward type before you finalize each scratch outcome.
Instant Win rewards
Set up rewards that resolve immediately after the scratch action.
Attribution slots
Plan advanced scheduled availability for each winning result.
Link rewards to touchpoints
Review the shared reward-linking flow used across OmniLab touchpoints.